

SellUp comes with some basic styling options out of the box that enable you to get SellUp matching your theme pretty well.
For some stores, this doesn’t always quite fit the bill. There may be other elements you need to style and SellUp is giving you the ability to style them. Also, some themes can actually conflict with styling classes from time to time. This can cause SellUp to not quite appear the way it should or you wanting it to.
Luckily, you can apply some custom CSS to fix these points.
How to Enable Custom CSS
First off, if you don’t know what CSS is then you probably don’t want to continue. CSS customization is for advance users who know their way around HTML and CSS, Classes and so on. We suggest hiring a 3rd party developer to style this for you from either the Shopify Experts Directory or a place like Upwork, Fiverr etc.
If you know what CSS is and are comfortable then let’s continue.
Enter your Custom CSS
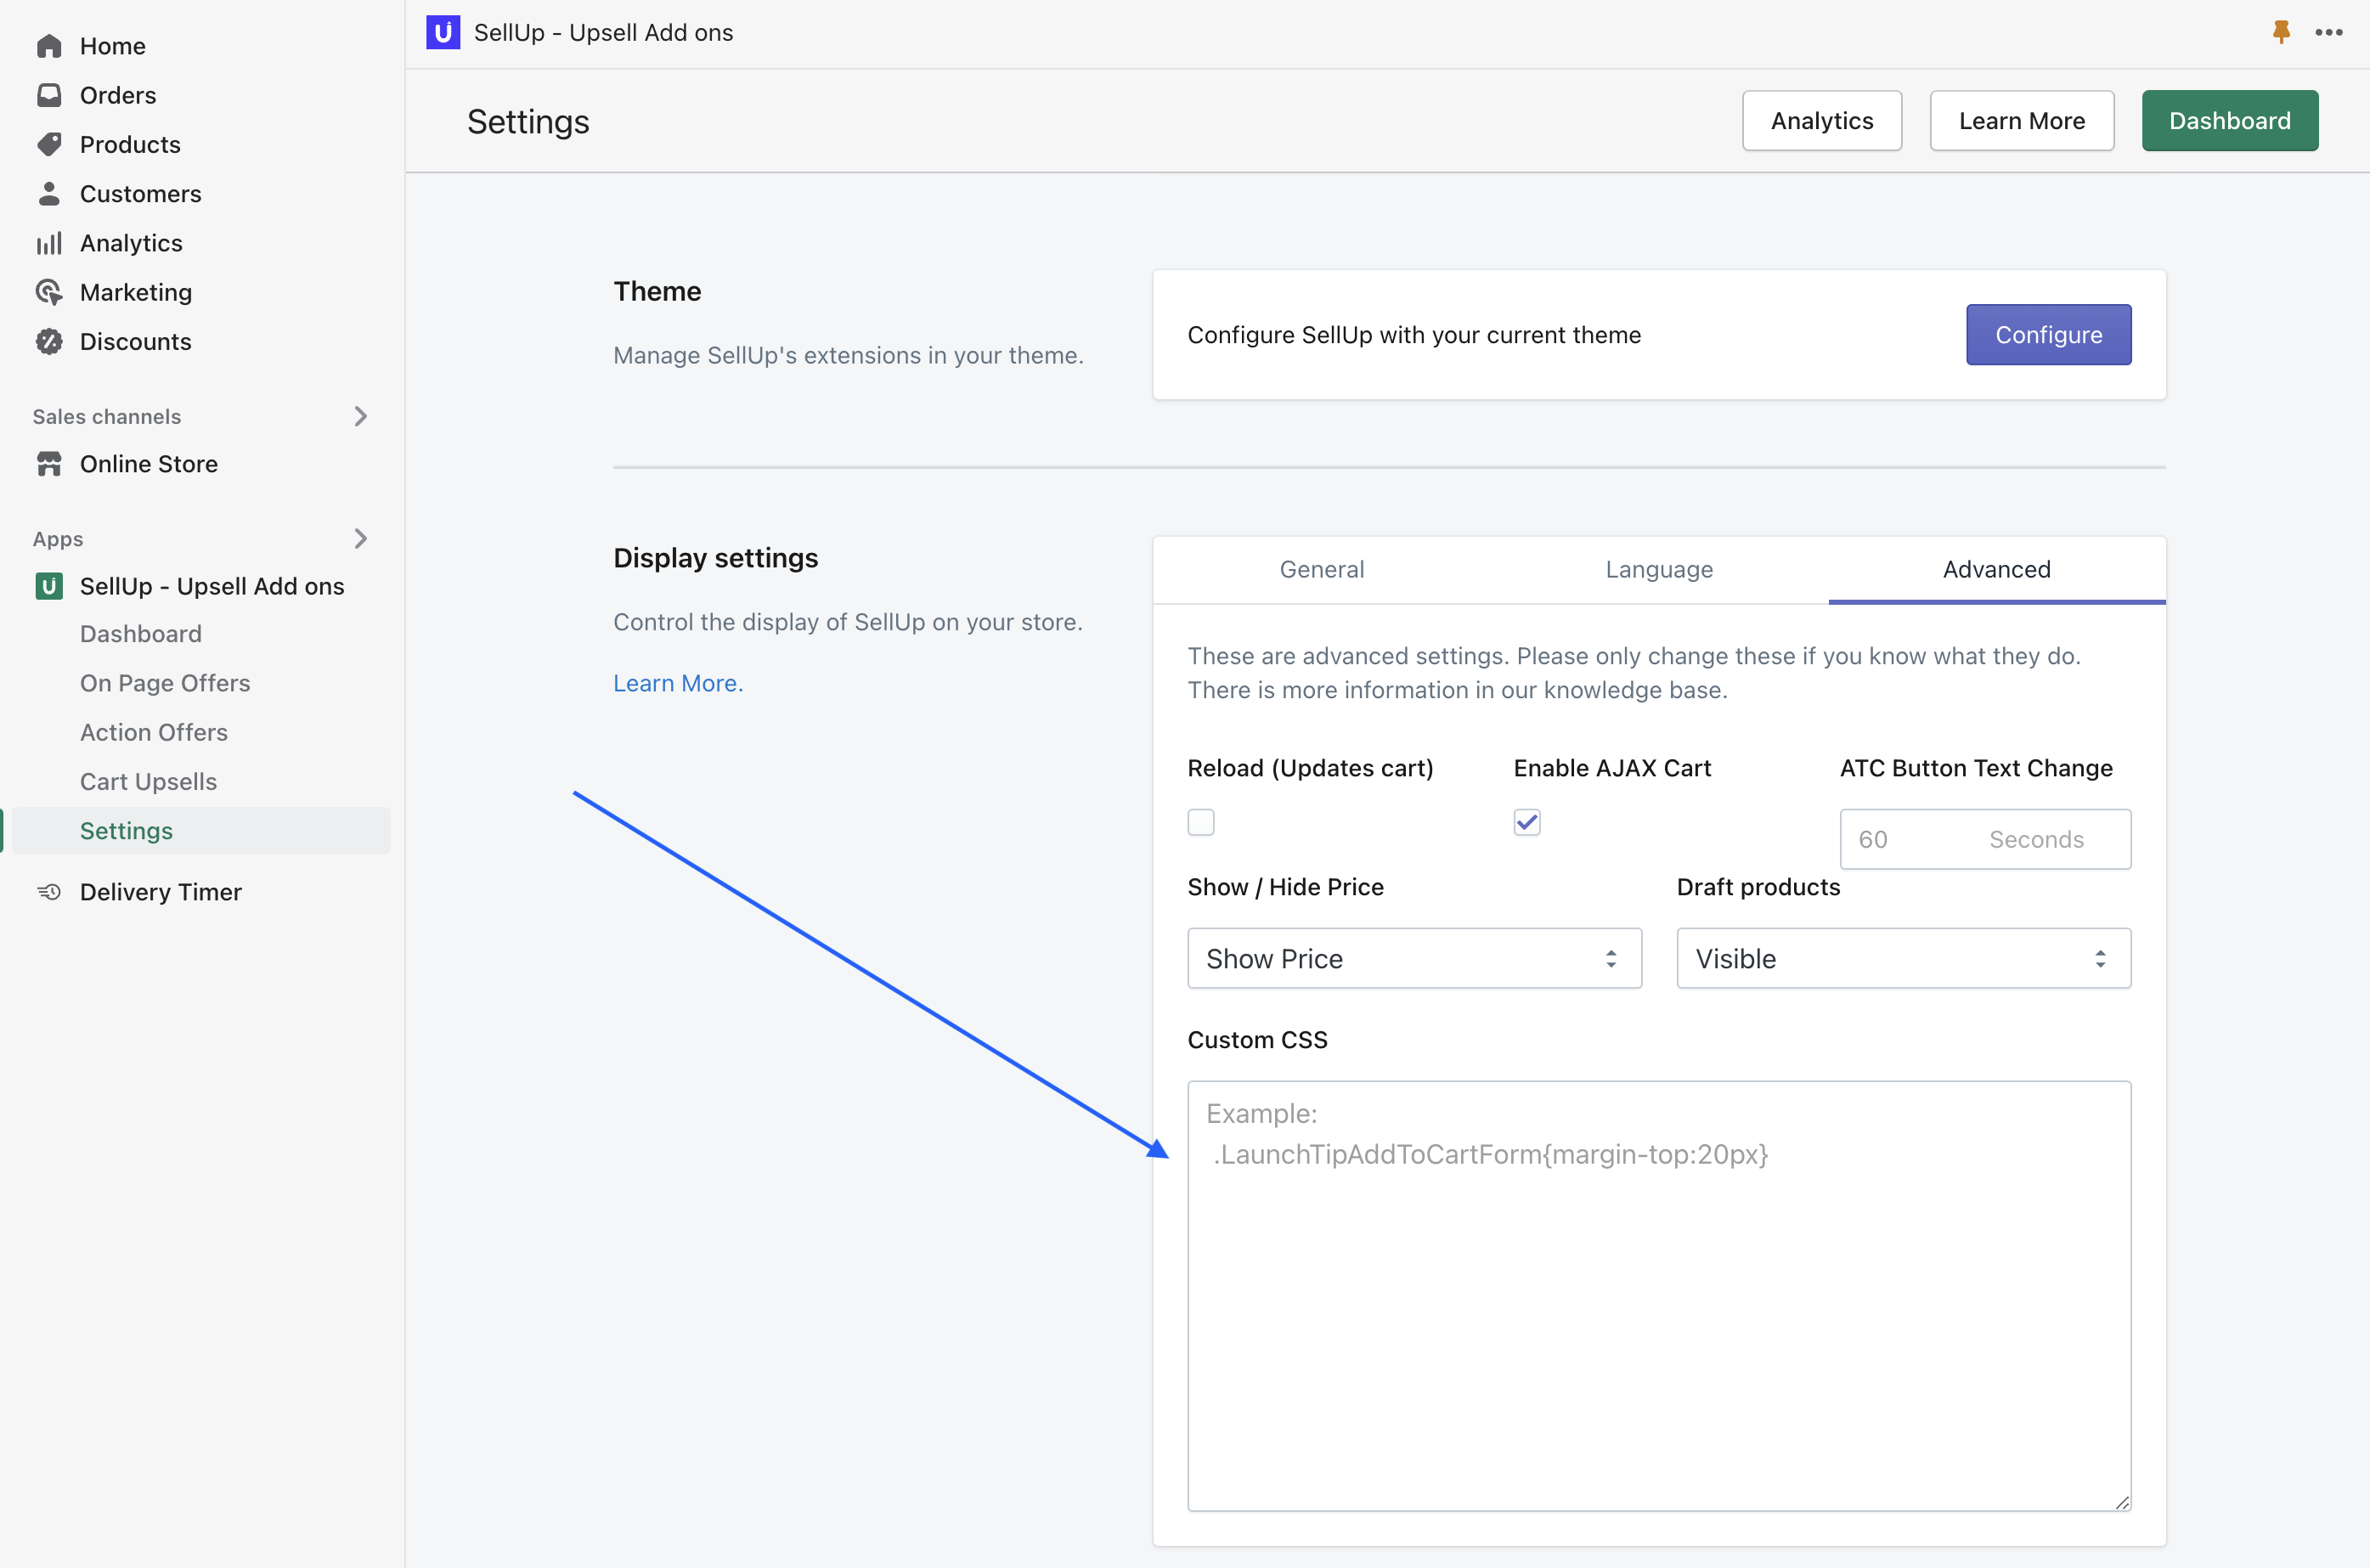
Simply enter your CSS into the box provided under Settings > Display Settings > Advanced (tab).
You need to make sure you enter CSS with no breaking spaces as if it were one continuous line (similar to minification) e.g
.launchtip-wrapper .title { font-weight: 300; font-size: 18px } .launchtip-wrapper .another-class { text-decoration: none;}.launchtip-wrapper .title {
font-weight: 300;
font-size: 18px
}You can use a minifier to achieve this.
Finally, click Save.
Now, on the frontend you should see your changes. If the widget has disappeared altogether then its an issue with the CSS. Simply check the CSS and make sure there are no breaks in it or errors.