

Pour chaque marchand, le processus de paiement Shopify joue un rôle crucial pour transformer les visiteurs de votre site en clients payants. Il est essentiel de proposer une expérience de paiement fluide et personnalisée afin de garantir la satisfaction client et d’augmenter vos ventes. Dans ce guide complet, nous vous expliquons tout ce que vous devez savoir pour personnaliser et optimiser votre paiement Shopify.
Personnaliser le paiement
L’un des grands avantages de Shopify est sa flexibilité pour personnaliser le processus de paiement afin qu’il corresponde à l’apparence et à l’identité de votre marque. Shopify utilise désormais un éditeur moderne de paiement et de comptes, qui rend la personnalisation plus simple et plus puissante que jamais. Pour personnaliser votre paiement, rendez-vous dans votre interface d’administration Shopify et allez dans Paramètres > Paiement. Dans la section Configurations, cliquez sur Personnaliser à côté de la configuration que vous souhaitez modifier. Cela ouvre l’éditeur de paiement et de comptes, où vous pouvez effectuer différents changements, notamment :
- Modifier les couleurs et les polices pour les aligner sur l’identité visuelle de votre marque.
- Téléverser votre logo pour l’afficher sur la page de paiement et renforcer la reconnaissance de la marque.
- Ajouter une image ou une couleur d’arrière-plan à l’en-tête du paiement.
- Personnaliser la section du récapitulatif de commande pour mettre en avant des informations supplémentaires ou des promotions.
Profitez de ces options de personnalisation pour créer une expérience de paiement cohérente et visuellement attrayante, qui inspire confiance à vos clients. L’éditeur de paiement et de comptes offre un espace unifié pour gérer votre paiement, vos pages de remerciement, vos pages de statut de commande et vos pages de compte client, séparément de l’éditeur de thème.
Vous pouvez également étendre le paiement grâce aux applications Shopify checkout et aux Shopify Extensions. Les Shopify Extensions sont basées sur des applications, compatibles avec les mises à niveau et s’intègrent parfaitement à Shop Pay. Découvrez une liste de nos meilleures recommandations ici.
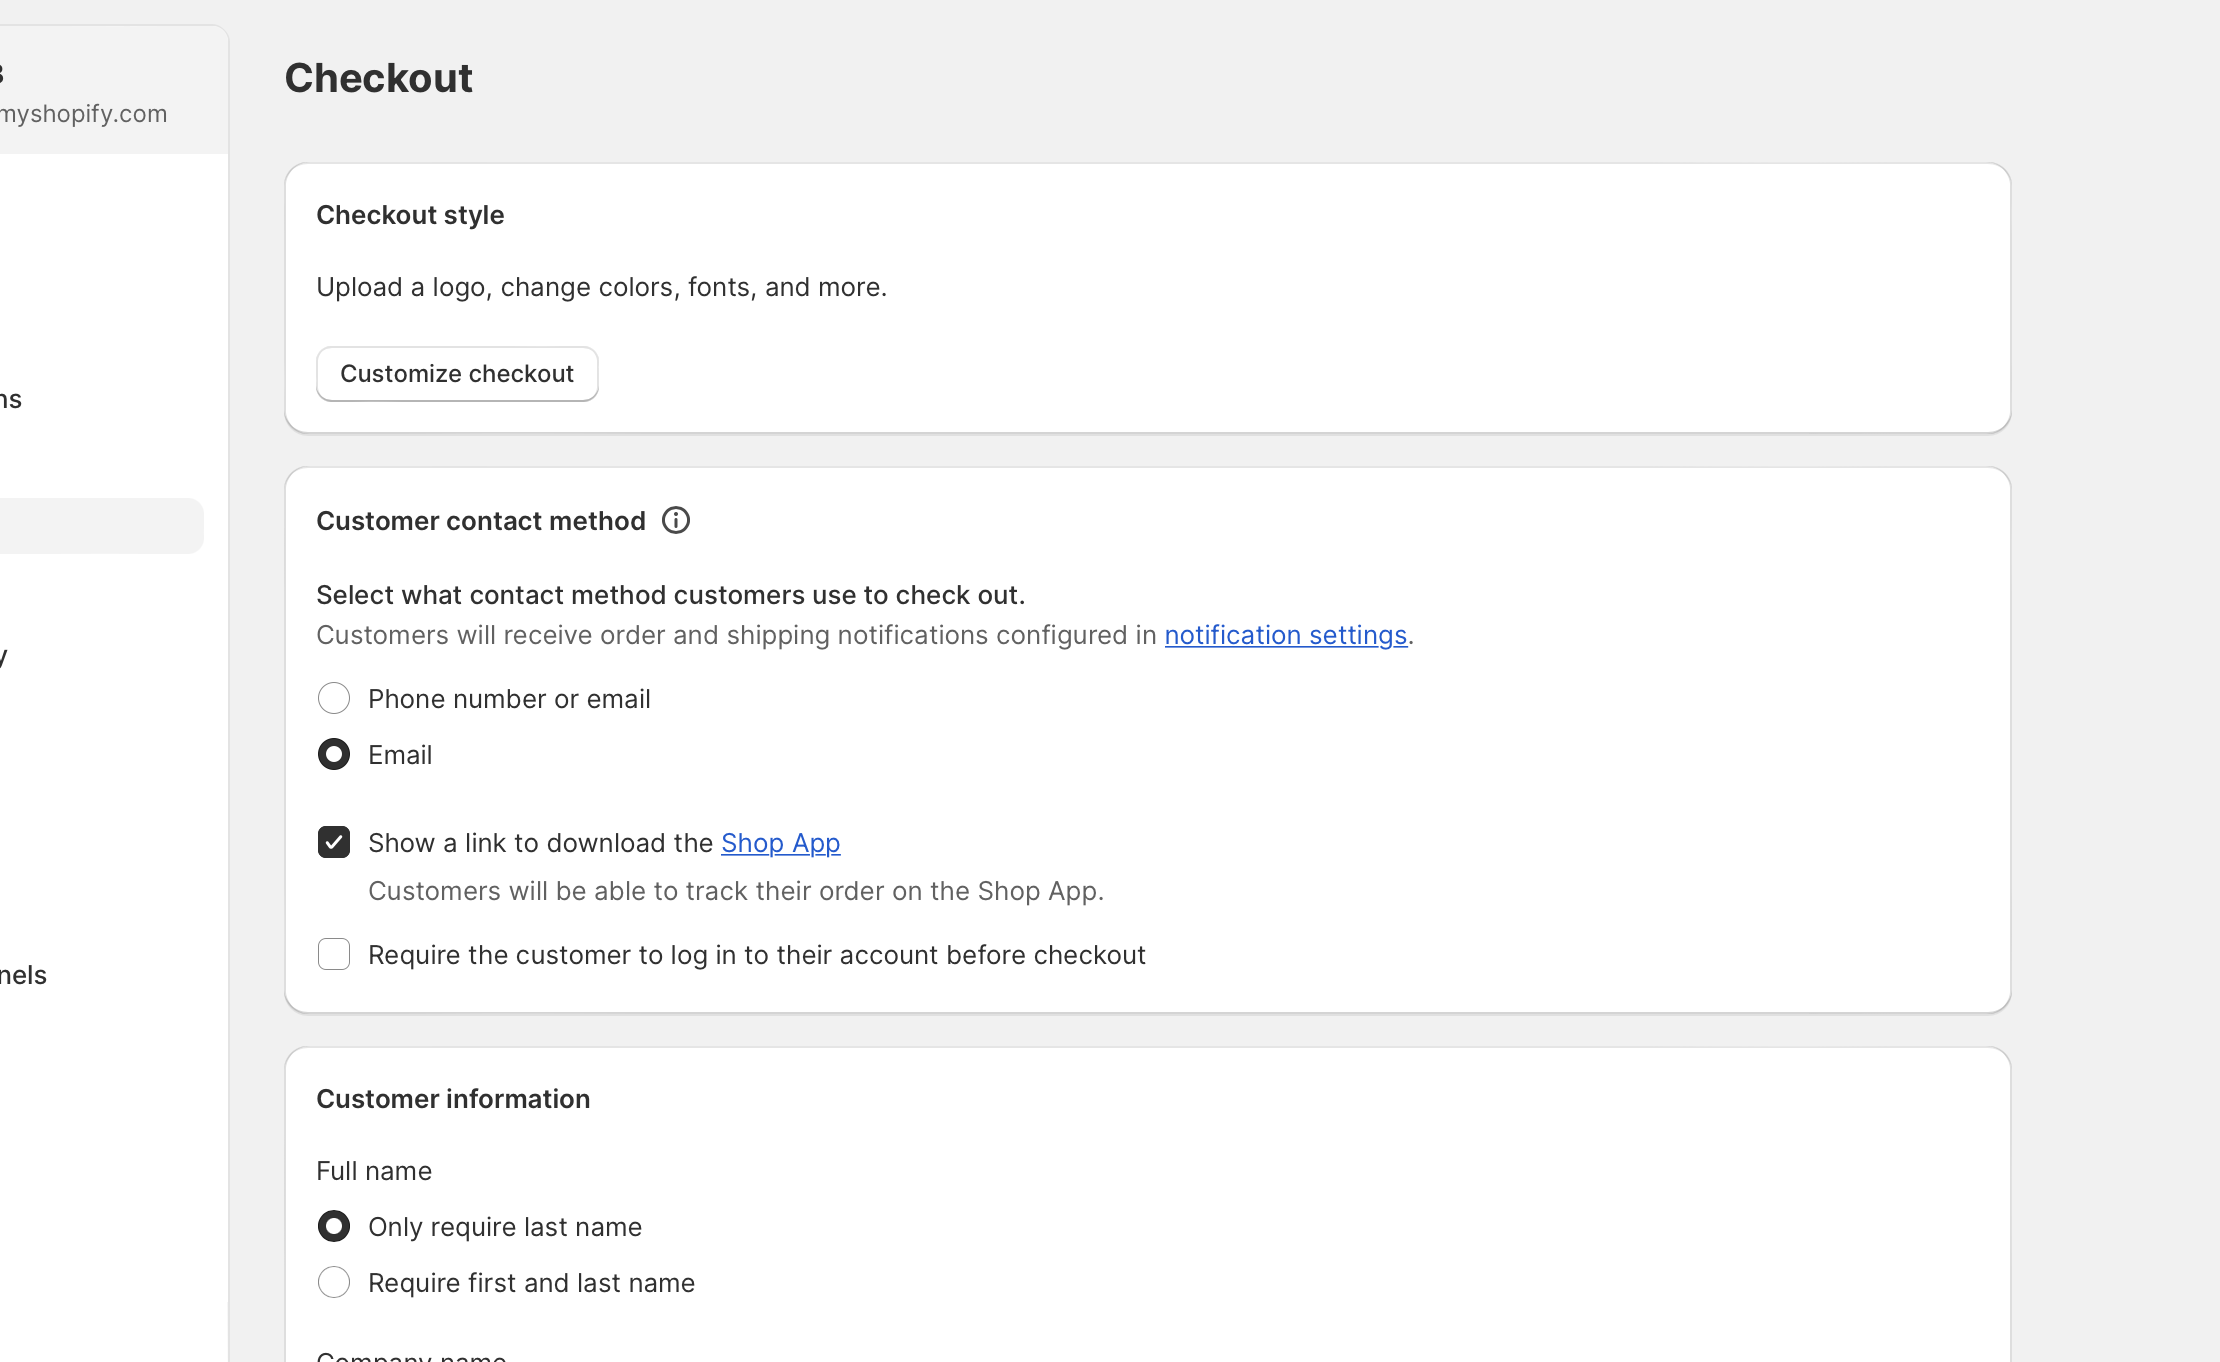
Modifier les options du formulaire de paiement
Le formulaire de paiement est l’endroit où les clients saisissent leurs informations personnelles, comme l’adresse de livraison et les détails de paiement. En configurant les options du formulaire de paiement, vous pouvez rendre le processus plus rapide et plus efficace pour vos clients.
Dans votre interface d’administration Shopify, allez dans Paramètres > Paiement > section Informations client. Ici, vous pouvez configurer les options du formulaire, ajouter ou supprimer des champs, définir des champs obligatoires ou facultatifs, et même demander des informations supplémentaires qui peuvent être utiles à votre activité, comme des préférences ou des instructions particulières.
Gardez à l’esprit qu’il vaut mieux ne demander que les informations essentielles, car un formulaire de paiement trop long peut décourager les clients de finaliser leur achat. Pour des personnalisations plus avancées, vous pouvez utiliser des applications de paiement depuis le Shopify App Store afin d’ajouter des champs personnalisés, des règles de validation et une logique conditionnelle à votre formulaire de paiement.
Configurer des options de pourboire pour les commandes en ligne
Si vous souhaitez permettre aux clients de laisser un pourboire lors de commandes en ligne, Shopify propose une méthode simple pour le mettre en place. Les pourboires peuvent être particulièrement utiles pour les entreprises de services ou celles qui misent fortement sur la reconnaissance client.
Pour activer les pourboires, allez dans Paramètres > Paiement, puis faites défiler jusqu’à la section Pourboires. À partir de là, vous pouvez activer les pourboires et configurer les pourcentages ou options que vous souhaitez proposer aux clients. Vous pouvez choisir des pourcentages prédéfinis ou autoriser les clients à saisir un montant personnalisé. Cette fonctionnalité s’intègre parfaitement à votre processus de paiement, sans nécessiter de code personnalisé.

Configurer le traitement et l’archivage des commandes
Optimiser votre système de traitement et d’archivage des commandes est essentiel pour maintenir l’efficacité et une bonne organisation. Shopify propose d’excellents outils pour vous aider à y parvenir.
Rendez-vous dans votre interface d’administration Shopify et allez dans Paramètres > Paiement > Traitement des commandes. Ici, vous pouvez configurer des paramètres tels que les emplacements d’exécution des commandes, l’archivage automatique des commandes pour une meilleure organisation, et même automatiser les confirmations de commande ou les notifications d’expédition afin de tenir vos clients informés à chaque étape.
Ajouter les politiques de la boutique
Afficher les politiques de votre boutique pendant le processus de paiement est essentiel pour communiquer vos conditions, modalités et politique de retour aux clients avant qu’ils ne finalisent leur achat.
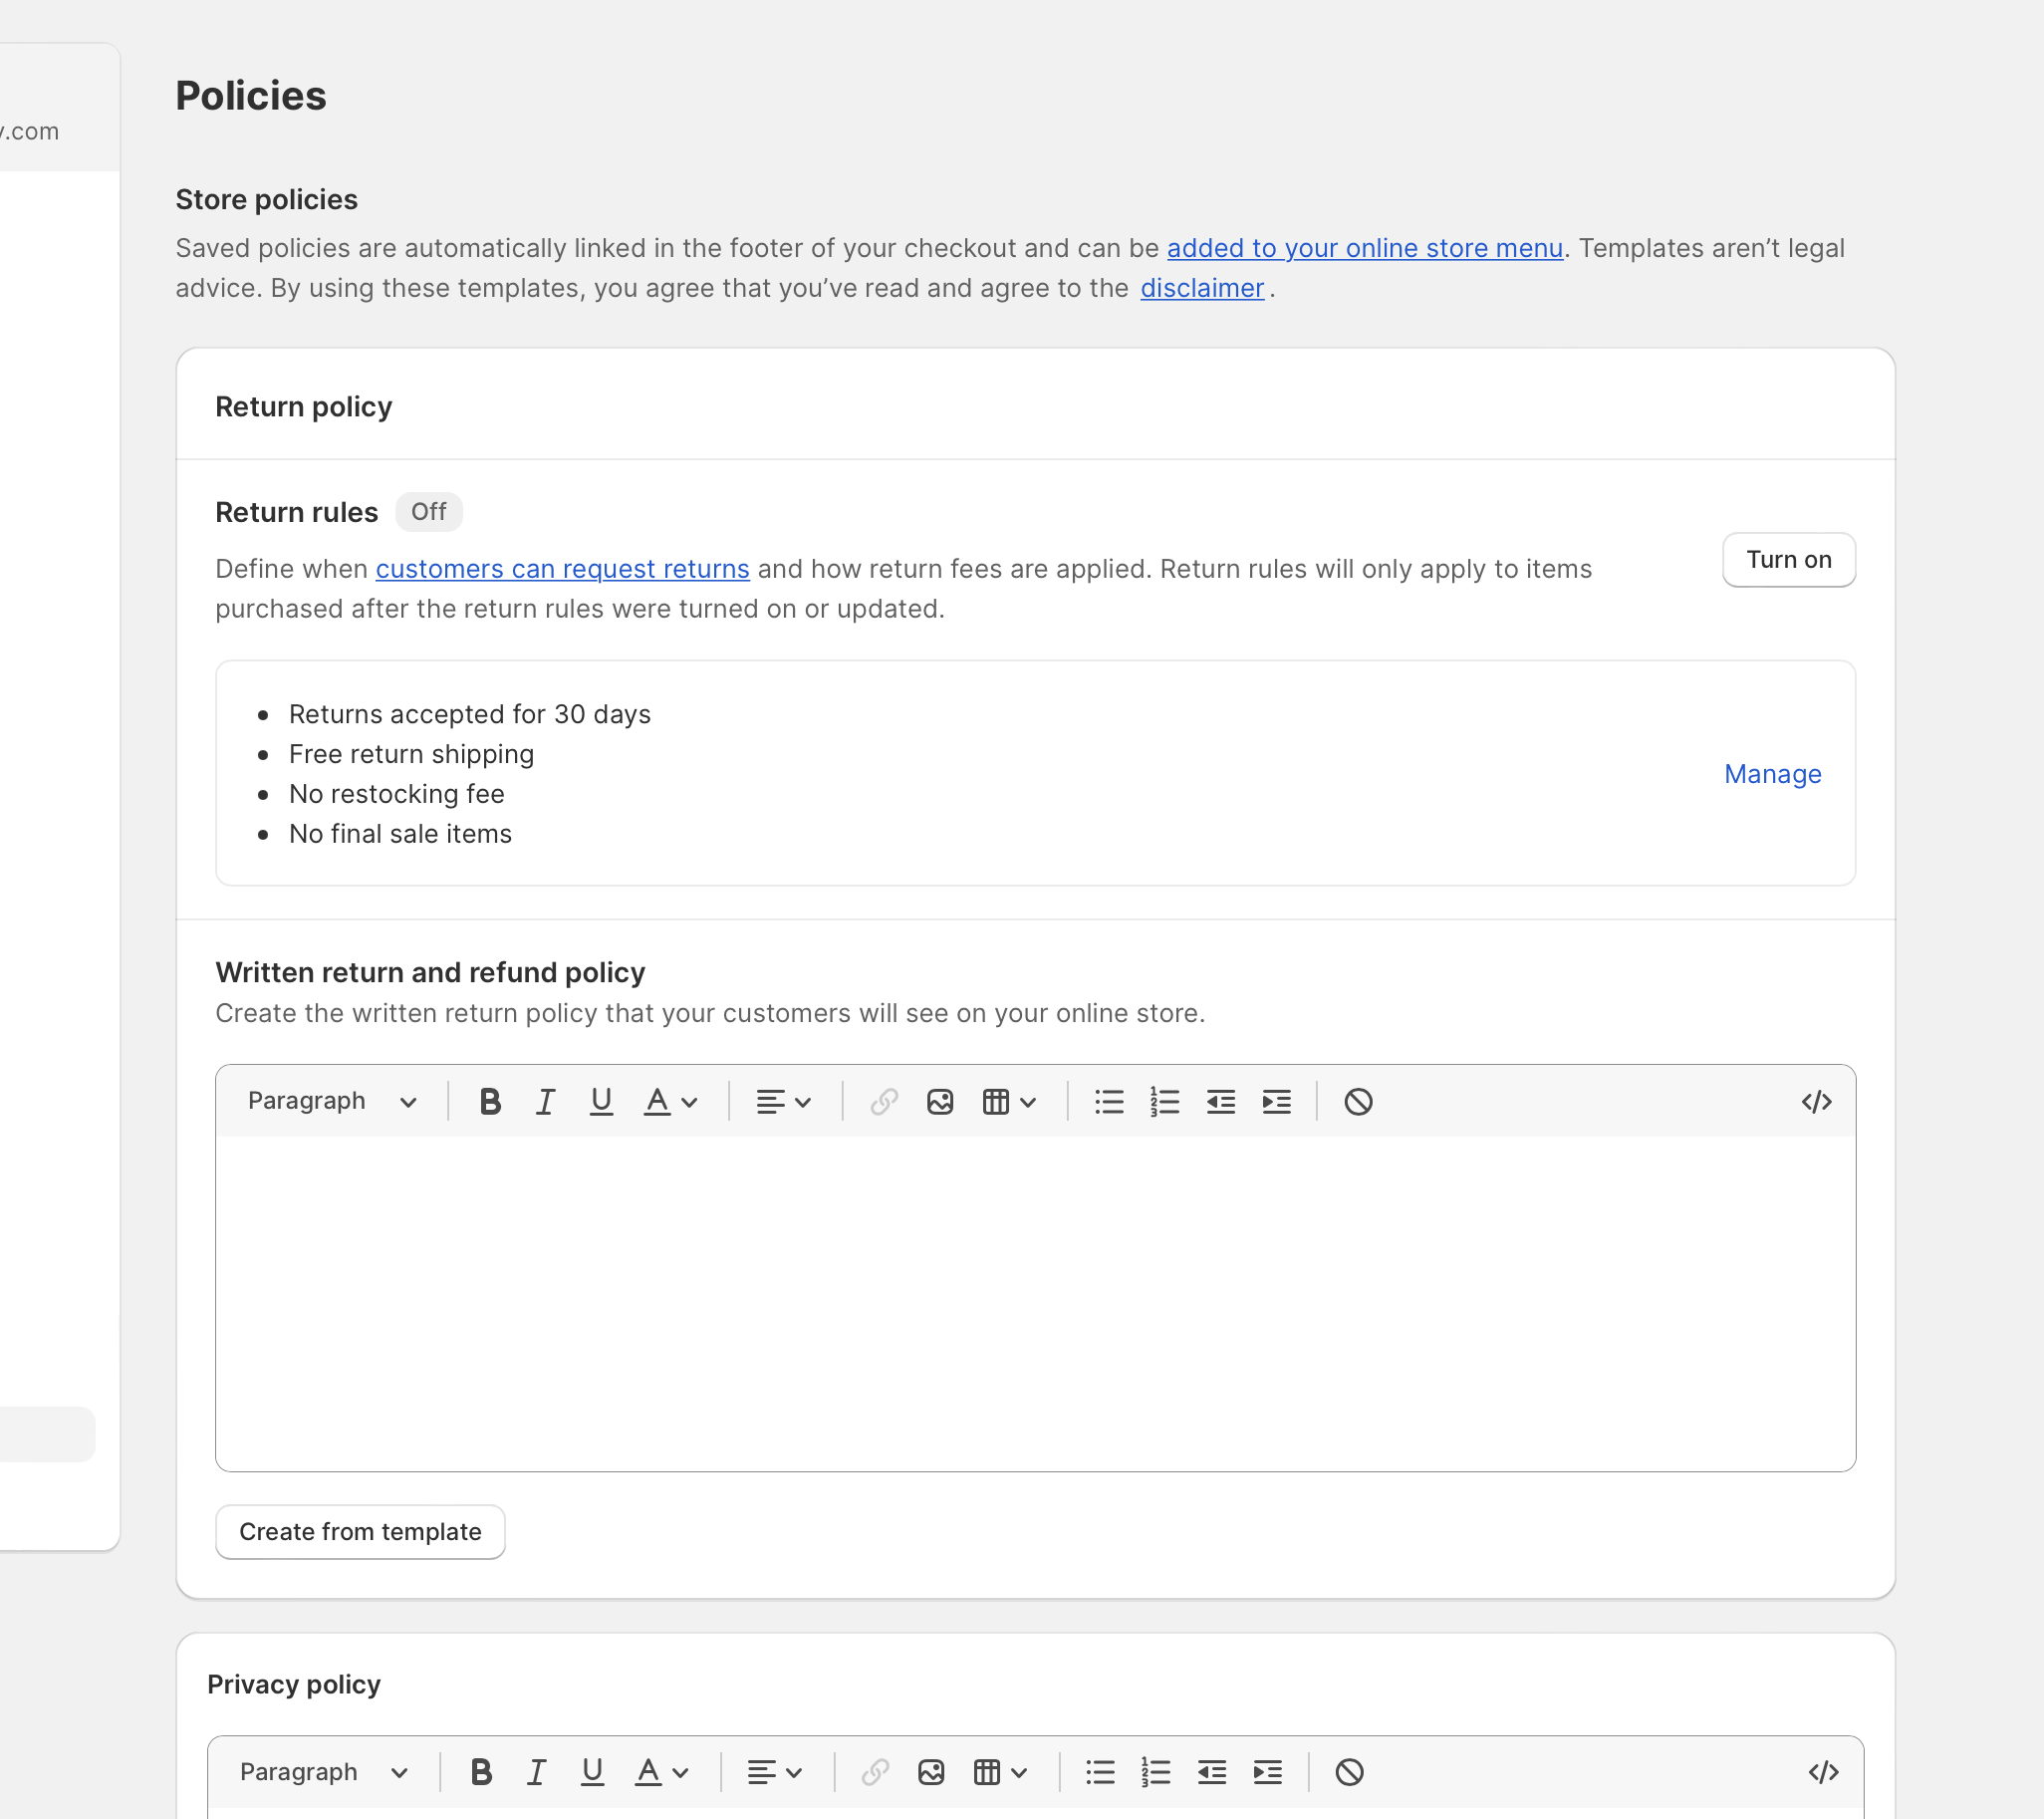
Pour ajouter les politiques de la boutique, allez dans Paramètres > Politiques. À partir de là, vous pouvez facilement créer et modifier votre politique de remboursement, votre politique de confidentialité, vos conditions d’utilisation et votre politique d’expédition. Ces politiques seront automatiquement affichées et accessibles pendant le processus de paiement, ce qui contribue à instaurer la confiance et la transparence avec vos clients. Shopify propose également des modèles de politiques pour vous aider à démarrer si vous n’avez pas encore créé les vôtres.
Personnaliser les moyens de paiement et les options de livraison au moment du paiement
Proposer plusieurs moyens de paiement et options de livraison au moment du paiement peut améliorer considérablement l’expérience utilisateur et augmenter les taux de conversion. Shopify offre une grande flexibilité pour configurer ces options afin de répondre aux exigences spécifiques de votre entreprise.
Allez dans Paramètres > Paiements pour gérer vos options de paiement. Vous pouvez choisir parmi différents prestataires de paiement, comme PayPal, Stripe ou Shopify Payments, et activer des options de paiement express telles que Shop Pay, Apple Pay et Google Pay. Pour les options de livraison, allez dans Paramètres > Expédition et livraison afin de configurer des méthodes ou des tarifs d’expédition spécifiques selon le poids, la taille ou la destination de vos produits.
Pour des personnalisations plus avancées des options de paiement et de livraison, vous pouvez installer des applications de personnalisation des paiements et de la livraison depuis le Shopify App Store. Ces applications vous permettent de masquer, réorganiser, renommer ou afficher de manière conditionnelle des moyens de paiement et des options de livraison selon des règles précises. Notez que certaines fonctionnalités avancées de personnalisation des pages de paiement (pages d’informations, d’expédition et de paiement) sont disponibles uniquement pour les marchands Shopify Plus.
Passer une commande test
Avant de mettre en ligne vos nouveaux paramètres de paiement, il est toujours recommandé de tester le processus de paiement pour vous assurer que tout fonctionne correctement.
Pour passer une commande test, rendez-vous dans votre interface d’administration Shopify et sélectionnez un produit. Ajoutez-le au panier, passez au paiement, puis simulez une transaction en utilisant le mode test de Shopify ou une passerelle de paiement de test. Ainsi, vous pouvez vivre l’ensemble du parcours du point de vue du client et identifier les points à améliorer. Vous pouvez également prévisualiser vos personnalisations de paiement directement dans l’éditeur de paiement et de comptes avant de les publier.
Conclusion
En conclusion, personnaliser et optimiser votre processus de paiement Shopify est une étape essentielle pour améliorer la satisfaction client, augmenter les conversions et booster vos ventes globales. Grâce à l’éditeur moderne de paiement et de comptes de Shopify et à la puissance des Shopify Extensions, vous disposez de plus de flexibilité que jamais pour créer une expérience de paiement fluide, à l’image de votre marque et facile à utiliser. En suivant les étapes décrites dans ce guide, vous aurez tout ce qu’il faut pour optimiser votre paiement et maximiser vos résultats. Pensez à surveiller et à affiner en continu votre processus de paiement afin de l’adapter à l’évolution des besoins et des préférences de vos clients, et profitez de l’écosystème grandissant d’applications de paiement disponibles dans le Shopify App Store.