Last Updated on by Dan S
Originally Published February 12, 2022.
How to add conversion tracking code to the checkout page only in Shopify
Conversion tracking will help you better understand the full value of your Shopify website and any online marketing campaigns you have running. With conversion tracking in place, you’ll be able to track how many products you are selling and which marketing channel brought the customer to your website.
By adding conversion tracking to your store’s checkout page, you can easily track how often your customers reach checkout and make a purchase. It helps to understand the purchasing trends for your Shopify store.
In order to add conversion tracking code to your store’s confirmation page, you’ll need to understand the following tasks.
Google Analytics
Firstly, you’ll need to add your store’s Google Analytics conversion tracking code to the checkout page of your store. Here’s a guide on setting this up.
Tracking orders
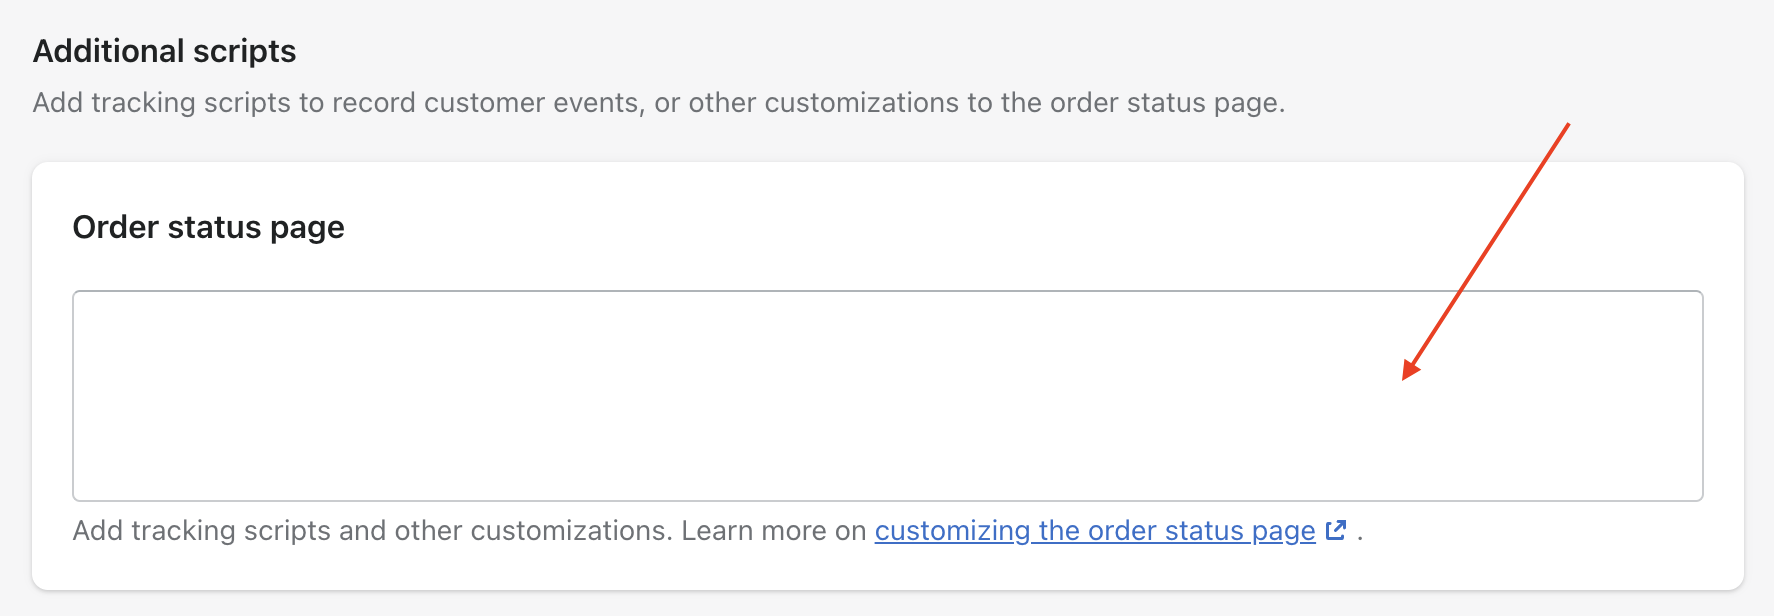
Here’s how to add code for tracking orders:
- Get the tracking code from a tracking pixel and copy it to the clipboard
- Then, go to Settings in your Shopify admin
- Click on Checkout
- Go to Order Processing and click on Additional Scripts
- Paste the code
Add conversion tracking
To add conversion tracking to the confirmation page only , you can add the following script:
<script type="text/javascript">

      if(Shopify.Checkout.step === 'thank_you')

      {

        /* Start Tracking Code */

        gtag('event', 'conversion', {

            'send_to': 'AW-xxxx/xxxx',

            'currency': 'USD',

            'transaction_id': '{{ checkout.id }}',

            'value': "{{ checkout.total_price | money_without_currency }}"

        });

        /* End Tracking Code */

      }

    </script>
Basic conversion tracking
Let’s say a third party has asked you to integrate a tracking pixel that looks like the following:
<img src="https://www.tracking.com/u?amount=<AMOUNT>&order-id=<ORDER_ID>&currency=<CURRENCY>" height="1" width="20" />
According to this code, here are the liquid tags.
- The order’s total price
- The order ID
- Currency
When the customer is on checkout’s last page, you will get the following code in the browser:
<img src="https://www.tracking.com/pixel.gif?amount=55.34&order-id=4343&currency=USD" height="1" width="1" />
When you get this code, you’ll know that the customer has reached the checkout.