

If you want to change the author name on a Shopify blog post, the short answer is this: Shopify still does not support true custom blog authors natively unless the author is a staff user, admin, or store owner. That means most merchants end up choosing between creating a staff account, using metafields plus theme edits, or installing a dedicated author app.
I have run into this limitation for years while building Shopify apps and helping merchants tidy up content, SEO, and trust signals. It is one of those small Shopify annoyances that becomes a real issue once you start publishing expert content, guest posts, or anything that needs a proper byline.
In this guide, I will show you exactly how to change the author name on your Shopify blog, what each method is best for, and which option I would use depending on how many contributors you have.
How do I change the author name on a Shopify blog post?
You can change the author name on a Shopify blog post by assigning a different staff account, or by creating a custom author metafield and updating your theme code. If you want guest authors, bios, or easier management, an app is usually the cleanest option.
This matches what is still showing up across Shopify Community threads and third-party guides in 2026. The native platform is still restrictive here, so the best method depends on whether you need a quick fix or a scalable setup.
Why is changing the author name in Shopify awkward?
Changing the author name is awkward because Shopify ties blog authors to user accounts, not to flexible content fields. In plain English, the author dropdown only pulls from store users.
That is fine if you are the only person writing content. It becomes messy if you work with freelancers, agencies, guest writers, nutritionists, stylists, or anyone else who should be credited publicly without being given back-end store access.
In my experience building Shopify apps, merchants usually discover this limitation after publishing a few articles and then trying to improve E-E-A-T signals, author credibility, or byline consistency. At that point, changing the setup across older posts can be surprisingly time-consuming.
What is the best way to change the author name in Shopify?
The best way depends on your setup. Using a staff account is the fastest method, while metafields are best if you want flexibility without adding users, and apps are best for non-technical stores with multiple contributors.
Here is the practical breakdown I would use.
| Method | Best for | Difficulty | Main downside |
|---|---|---|---|
| Staff account | Quickest native fix | Easy | Uses a staff seat and is poor for guest authors |
| Metafields + theme code | Flexible custom bylines | Medium | Needs code edits and testing |
| Hardcoded text or hidden byline | Single-brand blogs | Easy to medium | Not scalable per post |
| Author app | Multi-author blogs | Easy | Extra monthly app cost |
If you only need one or two author names and do not mind user management, the staff method is fine. If you publish content seriously and care about SEO, bios, and structured data, I would usually choose metafields or an app.
How do I change the author name natively in Shopify using staff accounts?
The native method is to create or edit a staff account and then assign that account as the article author. This is the simplest route because it uses Shopify's built-in author field.
It is also the method most often recommended in Shopify Community answers because it works without theme customisation. The catch is that the author must remain a valid user account if you want the byline to stay intact.
Step 1: Create or edit the staff account
Go to Settings > Users and permissions. Either create a new user or click into an existing one and update the first name and last name to match the author name you want displayed.
If you want the byline to show a brand name rather than a person, you can also use a company-style name here. I have seen merchants use names like Editorial Team or the store brand itself when they want consistency across all posts.
Step 2: Open the blog post in Shopify admin
Go to Online Store > Blog posts and open the article you want to edit. The author setting is usually found in the Organisation section of the editor.
This is where Shopify lets you choose the author from the available user accounts. If your desired name is not in the dropdown, it is not a valid user on the store yet.
Step 3: Select the new author from the dropdown
Choose the staff account you want to use and save the post. The article will then use that account as the native author value.
In many themes, this updates the visible byline immediately. It can also update any theme code or structured data that references {{ article.author }}.
Step 4: Check the live blog post
Open the post on the front end and confirm the author name has changed. If it does not update straight away, give Shopify a few minutes because theme and page caching can delay visible changes.
I always recommend checking both the article page and the blog listing page because some themes output the author in more than one template.
What are the drawbacks of the staff account method?
The main drawback is that it uses one of your staff accounts and is not ideal for temporary or guest contributors. If you delete that user later, Shopify can revert the byline to another available author.
This is the bit that catches merchants out. It feels like a simple workaround at first, but it becomes messy if you publish lots of guest content or if the writer should never have had a user account in the first place.
How do I change the author name without creating a staff account?
You can change the displayed author name without creating a staff account by using a custom metafield and then updating your theme to output that metafield instead of Shopify's default author value. This is the best no-extra-user workaround.
It gives you much more control and is the option I prefer for merchants who care about clean content operations. You can set a unique byline per article without adding random users to the store admin.
Step 1: Create a custom author metafield for blog posts
Go to Settings > Custom data > Blog posts and click Add definition. Create a field such as Custom Author Name with the type Single line text.
You can keep this simple with one field, or you can build a fuller setup with separate fields for author URL, author type, bio, and job title. For SEO-focused stores, I usually suggest at least a name field and an author URL field.
Recommended metafields:
-
Author name - namespace:
customorjsonld, key:author -
Author URL - key:
author_url -
Author type - key:
author_type, value usuallyPersonorOrganization
If you want to keep compatibility with structured data snippets, using the jsonld namespace can make your setup easier to follow later.
Step 2: Add the custom author name to each article
Open any blog post in Shopify admin and scroll to the metafields area at the bottom. Enter the name you want to show publicly, then save.
This gives you per-post flexibility. For example, one article can say Dr Jane Smith, another can say LaunchTip Editorial Team, and another can say Guest Contributor.
Step 3: Update your theme code to display the metafield
You then need to edit the theme file that outputs the author name and replace Shopify's default author variable with your metafield. In many themes, that means changing {{ article.author }} to something like {{ article.metafields.custom.author.value }}.
On Dawn, the relevant files are often main-article.liquid and article-card.liquid. Other themes may use different snippets, so search your codebase for article.author first.
Example:
-
Old code:
{{ article.author }} -
New code:
{{ article.metafields.jsonld.author.value }}
A more robust version includes a fallback so the theme still works if the metafield is empty.
-
Safer fallback logic:
{{ article.metafields.jsonld.author.value | default: article.author }}
I strongly recommend using a fallback. It prevents blank author names on older posts and makes rollouts much safer.
Step 4: Update structured data if your theme outputs Article schema
If your theme includes JSON-LD article schema, you should update that too. Otherwise, the visible byline may show one name while the structured data still shows the Shopify staff account.
This matters because consistency between on-page content and schema is good practice for SEO. You can validate changes using Schema Markup Validator or Google's Rich Results Test.
Shopify themes vary a lot here. Some include article schema in the main article template, while others use snippets or SEO apps. Search your theme files for terms like BlogPosting, Article, or author.
Step 5: Test the blog post properly
After saving, check the live article page, the blog index, and the source code. Then test the schema separately.
When I test this on client stores, I also check mobile output and article cards in featured blog sections on the homepage. Themes often reuse the author field in multiple places, and it is easy to miss one.
How do I hardcode or hide the author name in Shopify?
If you do not need different bylines per post, you can hardcode a static author name or remove the author entirely in your theme. This is the simplest code-based option for single-brand blogs.
It is not ideal for publications with multiple contributors, but it works well if every article should appear under the same brand or editorial team.
For example, you might replace:
{{ article.author }}
with:
LaunchTip Editorial Team
or remove the author block completely.
If your goal is a cleaner article layout, this can be a sensible option. It is similar to how merchants sometimes simplify other theme elements, such as removing vendor names or extra labels from product pages. If that is on your list too, see my guide on how to remove the vendor name from product pages.
Why does the author name matter for SEO and trust?
The author name matters because it helps readers understand who wrote the content and can strengthen credibility, expertise, and trust. For content in competitive niches, a proper byline can be more than just cosmetic.
Google does not give you a ranking boost simply for adding an author name. But in practice, stores that publish better attributed content often do a better job of signalling expertise, especially when the author is a real specialist with a profile page or credentials.
In my experience, this matters most for stores publishing advice-led content such as skincare, nutrition, pet care, legal compliance, or technical buying guides. A generic byline like Admin is rarely the strongest option if you are trying to build authority.
If you are actively improving your content structure, it is also worth tightening up related SEO details like title tags. I covered one common annoyance in how to remove your shop name from the title tag in Shopify.
What are the best Shopify apps for changing blog authors?
The best Shopify apps for changing blog authors are the ones that let you add custom bylines, author bios, and profile information without editing theme code. For most non-technical merchants, an author app is the easiest long-term solution.
Here are the main options worth looking at from the current app ecosystem.
| App | Best for | Key benefit | Link |
|---|---|---|---|
| Custom Authors | Simple custom bylines | No need to create staff users | View app |
| RuffRuff Author Profiles | Author bios and profile blocks | Good for content-heavy blogs | View app |
| LFS Author Signature | Signature sections and author info | Useful visual byline enhancement | View app |
| Hyve Custom Blog Authors | Multiple contributors | Built for custom blog author management | View app |
Custom Authors
Custom Authors is a straightforward app for adding custom author names to Shopify blog posts without touching theme code. It is a sensible option if your main goal is simply to stop using staff accounts for bylines.
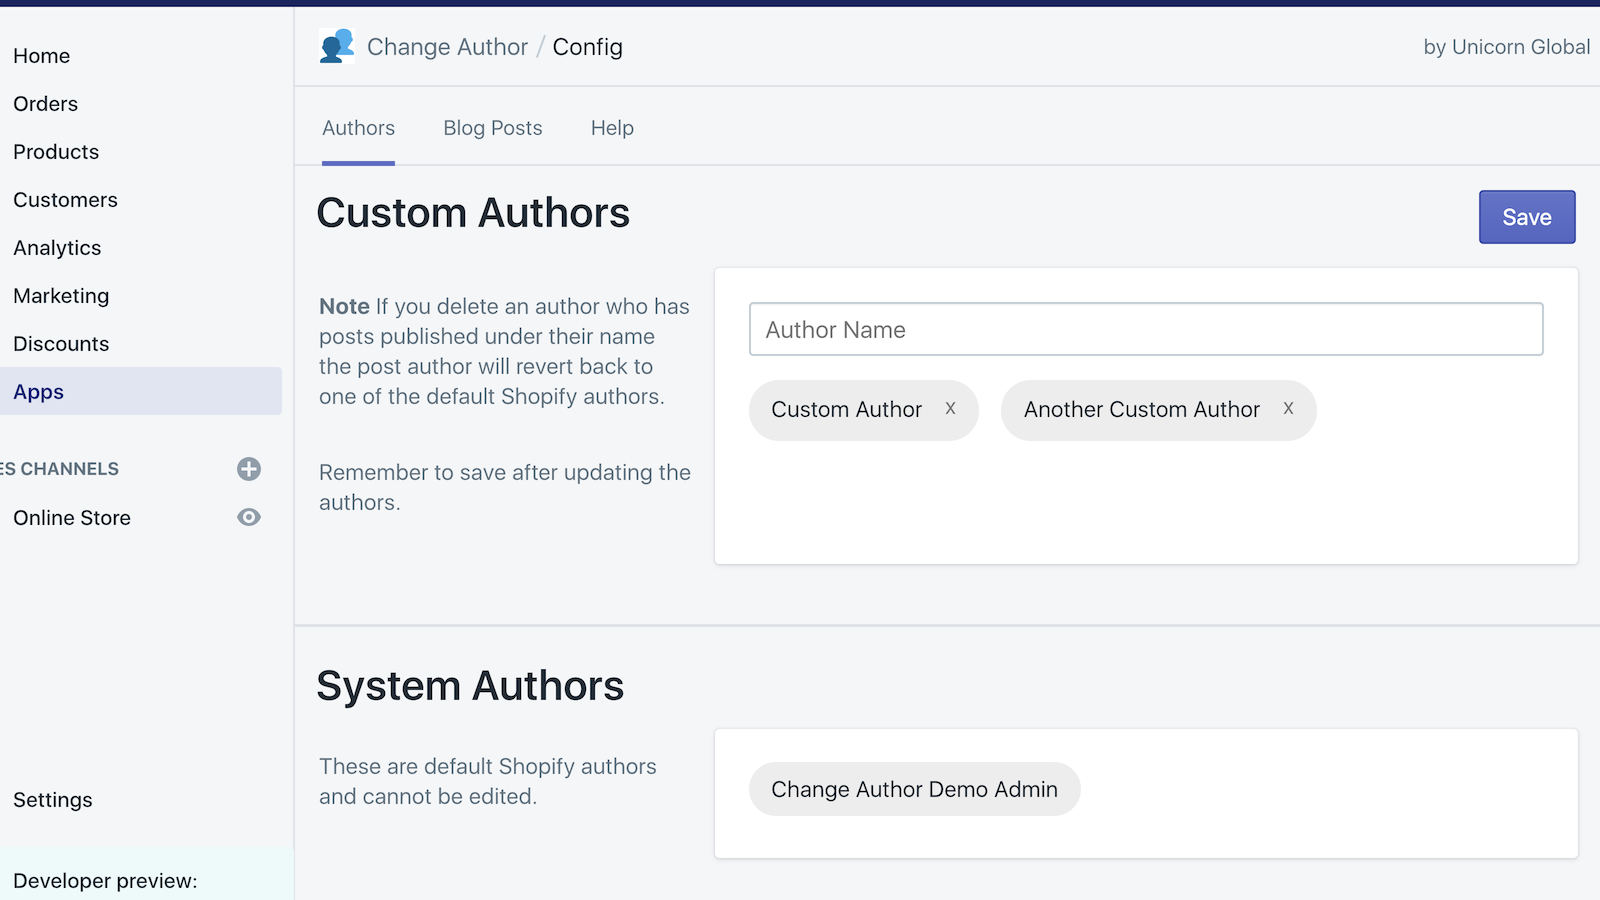

For merchants who want a quick setup, Custom Authors is usually the first app I would test. It focuses on the core problem and keeps implementation simple.
RuffRuff Author Profiles
RuffRuff Author Profiles is better suited to stores that want more than just a name swap. It is designed for richer author presentation, such as profile sections and contributor information.

If you are turning your Shopify blog into a proper publication, RuffRuff Author Profiles is worth a look.
LFS Author Signature
LFS Author Signature focuses on adding a more visible author signature or byline component to posts. That can work well if your theme currently hides author details or makes them too subtle.

You can view it here: LFS Author Signature.
Hyve Custom Blog Authors
Hyve Custom Blog Authors is another option built specifically around custom blog author management. It is useful if you need several contributors and want a more app-led workflow.

You can check the app listing here: Hyve Custom Blog Authors.
Which method should I choose?
If you only need a quick change, use a staff account. If you want control and do not mind editing code, use metafields. If you want the easiest non-technical multi-author setup, use an app.
That is the honest version. Here is how I would decide in practice.
- Choose staff accounts if you have 1 to 2 internal writers and want the fastest native setup.
- Choose metafields if you care about SEO consistency, guest authors, and scalable bylines.
- Choose an app if you do not want to edit Liquid or maintain custom theme logic.
- Choose hardcoded text if every article should use the same brand author name.
For most serious content stores, my preference is metafields with a fallback. It is cleaner than creating fake staff users and gives you much more control over future content.
What problems should I watch out for when changing Shopify blog authors?
The most common problems are blank bylines, theme inconsistencies, and schema mismatches. These usually happen when the author is updated in one place but not everywhere else.
Here are the issues I see most often:
- The author changed on article pages but not on blog cards - update all relevant snippets and sections.
- The visible author changed but schema still shows the old name - update JSON-LD output too.
- Deleting a staff account broke the byline - avoid relying on temporary user accounts.
- The metafield is empty on older posts - use fallback logic in Liquid.
- Theme updates overwrite custom edits - document your changes before updating themes.
This is one reason I always recommend backing up theme changes and content workflows before editing anything. If you are doing more work on your store content, you may also want to read my guide on how to back up blog posts and pages in Shopify.
Can I create author bio pages in Shopify?
Yes, you can create author bio pages in Shopify, but there is no strong native author system for this. Most stores either use pages, metaobjects, or apps to build author profiles.
If you are investing in content marketing, this is worth doing. A proper author page can support trust, let you link credentials, and create a cleaner internal linking structure for your blog.
For a lightweight setup, create a standard Shopify page for each author and store that page URL in an author URL metafield. For a more advanced setup, use metaobjects to create reusable author profiles and connect them to blog posts.
Does changing the author name affect existing blog posts?
Yes, changing the author name can affect existing posts, but the impact depends on the method you use. Editing a staff user's name changes every post assigned to that user, while metafields let you control posts individually.
This is an important distinction. If you rename a staff user from John to Editorial Team, every post assigned to John may now display that new name. That can be useful, but it can also create accidental changes across your archive.
With metafields, each post can keep its own byline. That is why I see metafields as the safer long-term option for stores with a growing content library.
My recommended setup for most Shopify stores
My recommended setup for most stores is a custom blog post metafield for author name, a fallback to Shopify's native author, and optional author URL support in your schema. It is flexible, future-proof, and does not waste staff seats.
In my experience building Shopify apps, this is the sweet spot between simplicity and control. It avoids the admin clutter of fake users, keeps your front end tidy, and makes it easier to add guest experts later.
If your blog is becoming an important acquisition channel, it is also worth reviewing your wider content tooling. I covered some useful options in my roundup of Shopify apps for blogs.
Final thoughts on changing the author name on your Shopify blog
Changing the author name on Shopify is absolutely possible, but there is still no perfect native guest author system. For now, you are choosing between staff accounts, metafields, hardcoded theme edits, or apps.
If you want the quickest answer, use a staff account. If you want the best long-term setup, use metafields and update your theme properly. If you want the easiest no-code route, test an app like Custom Authors.
That is the real step-by-step answer most ranking pages gloss over. The trick is not just changing the visible byline. It is making sure your theme output, structured data, and content workflow all stay consistent afterwards.