
To add conversion tracking code to the checkout page only in Shopify, the correct method now depends on whether your store is still using a legacy checkout setup or Shopify's newer extensibility stack. For most stores in 2026, the right approach is Settings > Customer events > Custom pixels, then firing your tracking only on the checkout_completed event.
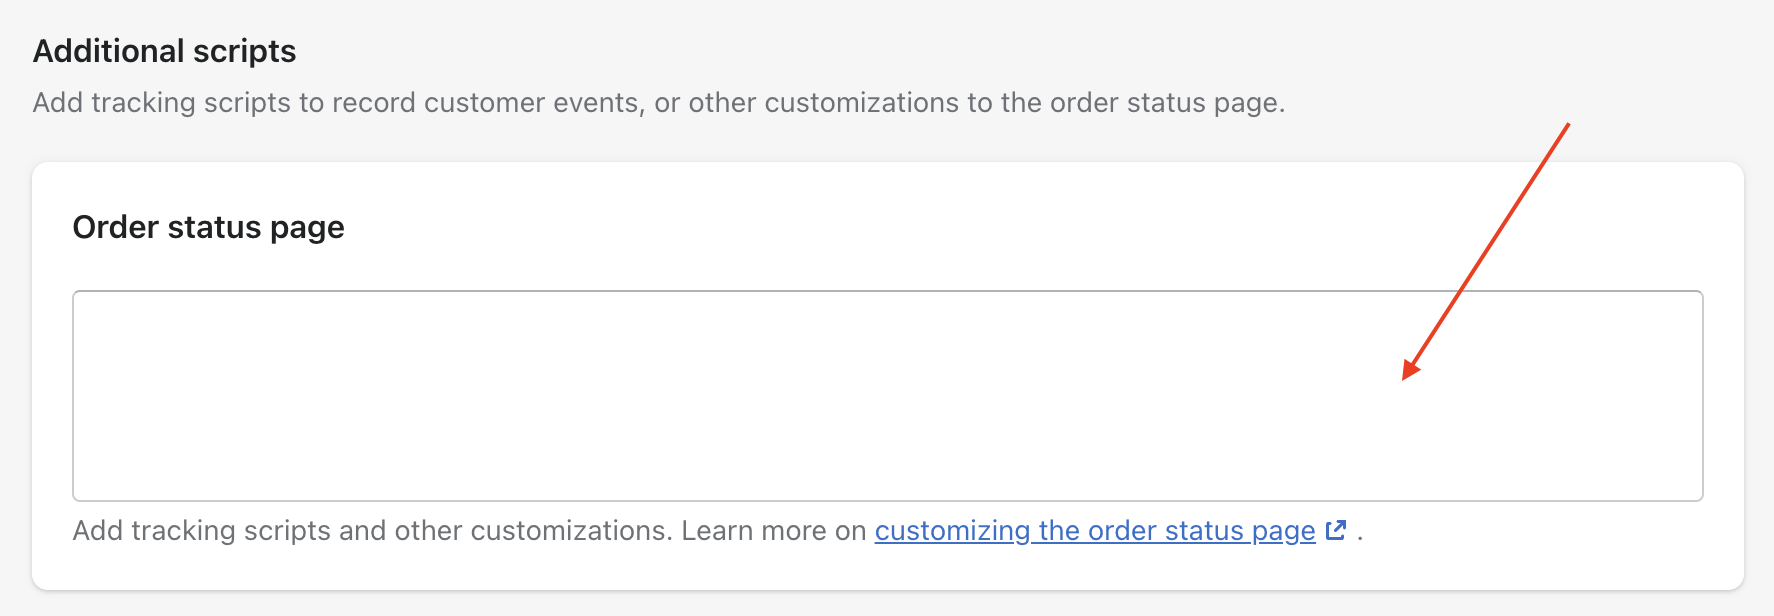
If you found older guides telling you to paste scripts into Additional scripts under the order status page, treat them cautiously. In my experience building Shopify apps and helping merchants with tracking issues, this is where a lot of duplicate conversions, broken tags, and migration headaches start. Shopify has moved hard towards Customer Events, web pixels, and sandboxed tracking, so the implementation standard has changed.
This guide covers what still works, what no longer works, and how to track checkout-only conversions properly for Google Ads, Google Analytics, and third-party platforms.
What is the best way to add conversion tracking to the Shopify checkout page only?
The best way to add checkout-only conversion tracking in Shopify is to use a custom pixel that listens for the checkout_completed event. This lets you fire tracking only after a successful purchase, rather than across product, cart, or checkout steps.
That matters because a lot of merchants do not actually want "checkout page" tracking in the literal sense. They usually want purchase confirmation tracking or thank you page tracking, which is what ad platforms like Google Ads and Meta need for accurate conversion reporting. If your code runs too early, you can end up counting initiated checkouts instead of completed orders.
In practical terms, there are two Shopify eras you need to know about:
- Legacy method: paste code into Additional scripts on the order status page
- Current method: use Customer Events and a custom pixel
For most merchants reading this today, Customer Events is the correct answer.
Can I still use Additional Scripts for checkout conversion tracking in Shopify?
In most cases, no. Shopify has deprecated the old Additional Scripts and checkout.liquid approach for modern checkout customisation and tracking.
The older method used to be simple. You would go to Settings > Checkout, scroll to the order status page, and paste your conversion code there. That worked because the script only loaded after the order was completed. It was popular for Google Ads conversion tags, affiliate pixels, and basic image-based tracking snippets.
But Shopify's checkout architecture has changed. As of the current extensibility model, merchants are expected to use web pixels and customer events instead. If you are migrating from an older setup, do not assume your legacy scripts are still firing correctly just because they still appear in the admin.
Important: if your store has old tracking code in multiple places, you may be double-counting purchases. I have seen this happen when a merchant uses the Google & YouTube app, a custom pixel, and an old thank you page script all at once.
How do I add conversion tracking code using Shopify Customer Events?
You add conversion tracking in Shopify by creating a custom pixel and subscribing to the checkout completion event. This is the cleanest way to track purchases without touching the checkout UI itself.
Here is the step-by-step process I recommend.
- In your Shopify admin, go to Settings
- Click Customer events
- Click Add custom pixel
- Name it something clear, such as Google Ads Purchase Tracking
- Paste your tracking code into the code editor
- Save the pixel
- Click Connect to activate it
- Test it with a real order or test order
This method does not mean your conversion code fires site-wide. The pixel is available site-wide, but your code can be scoped so it only runs when Shopify emits the checkout_completed event.
What does a basic checkout-completed tracking pixel look like?
A basic Shopify custom pixel listens for checkout_completed and then sends the order data to your tracking platform. The event payload includes the most important values, such as order ID, currency, and total value.
analytics.subscribe("checkout_completed", (event) => {
  gtag('event', 'conversion', {
    'send_to': 'AW-XXXXXXX/XXXXXXXXXXX',
    'currency': event.data.checkout.currencyCode,
    'transaction_id': event.data.checkout.order.id,
    'value': event.data.checkout.totalPrice.amount
  });
});
This is the pattern I use most often when merchants want Google Ads purchase conversion tracking without loading unnecessary scripts elsewhere. It is simple, event-driven, and much easier to maintain than older theme hacks.
What data should I send in Shopify conversion tracking?
The minimum data you should send is transaction ID, order value, and currency. Without these, conversion platforms can struggle with deduplication, revenue attribution, and reporting accuracy.
For purchase tracking, these are the fields I consider essential:
- Transaction ID - prevents duplicate conversion counts
- Value - lets ad platforms optimise for revenue, not just volume
- Currency - critical for stores selling internationally
In some setups, you may also want product-level data, tax, shipping, coupon codes, or customer identifiers where policy and platform rules allow. But for most merchants, getting the core three fields right is 90% of the battle.
When I audit Shopify stores, the most common issue is not that tracking is absent. It is that the tracking exists but the values are wrong. For example, merchants send a cart total instead of the final order total, or they omit the transaction ID completely.
How do I add Google Ads conversion tracking to Shopify checkout only?
The easiest and safest option for Google Ads is usually Shopify's official Google integration first, and a custom pixel second if you need manual control. If you only need standard Google tracking, start with the official app.
Shopify and Google both push merchants towards the Google & YouTube app because it handles a lot of setup for you, including tag installation and product sync. For many stores, that is the best low-maintenance option.

If you need a manual Google Ads purchase event, use a custom pixel like this:
analytics.subscribe("checkout_completed", (event) => {
  gtag('event', 'conversion', {
    'send_to': 'AW-123456789/AbCdEfGhIjKlMnOp',
    'transaction_id': event.data.checkout.order.id,
    'value': event.data.checkout.totalPrice.amount,
    'currency': event.data.checkout.currencyCode
  });
});
Transaction ID is especially important for Google Ads. If you leave it out, duplicate conversions become much harder to catch. Google's own documentation also leans heavily on proper tag configuration and conversion action setup, not just pasting a snippet somewhere.
If you are working on broader checkout performance as well as tracking, my guide on how to optimise Shopify checkout and increase conversions is a good next read.
Should I use the Google & YouTube app or manual code?
Use the official app if your needs are standard. Use manual code if you need custom event logic or a third-party requirement the app cannot support.
Here is how I think about it after years of app development in the Shopify ecosystem:
| Option | Best for | Pros | Cons |
|---|---|---|---|
| Google & YouTube | Most merchants | Official integration, easier setup, lower maintenance | Less flexible for custom tracking logic |
| Custom pixel | Advanced setups | Precise event control, custom parameters, supports non-standard requirements | Needs testing, easier to misconfigure |
| Legacy Additional Scripts | Older stores only | Simple historical method | Deprecated, not future-proof, easy to duplicate tracking |
How do I add a third-party tracking pixel that only fires after purchase?
You can add a third-party purchase pixel in Shopify by creating the request inside a checkout_completed event subscription. This works well for affiliate networks, partner reporting tools, and older image-based conversion systems.
For example, a third party may give you a simple tracking image URL with placeholders for amount, order ID, and currency. In a modern Shopify setup, you should map those values from the event object rather than using legacy Liquid variables.
analytics.subscribe("checkout_completed", (event) => {
const img = document.createElement('img');
img.src = `https://www.tracking.com/pixel.gif?amount=${event.data.checkout.totalPrice.amount}&order-id=${event.data.checkout.order.id}¤cy=${event.data.checkout.currencyCode}`;
img.height = 1;
img.width = 1;
document.body.appendChild(img);
});This is one of the most common migration jobs I see. A merchant has an old affiliate or ad network pixel that used to live on the thank you page, and now needs to be rewritten for Customer Events. The good news is that many of these scripts are still perfectly possible, as long as they do not depend on direct checkout DOM access.
What is the difference between checkout tracking and purchase tracking in Shopify?
Checkout tracking measures a shopper entering or progressing through checkout. Purchase tracking measures a completed order. They are not the same event, and mixing them up leads to bad reporting.
This matters because the keyword "checkout page only" often creates confusion. Some merchants want to track checkout_started, while others want to track only the final conversion on the thank you page. Ad platforms usually care most about completed purchase events.
Here is a simple comparison:
| Tracking type | When it fires | Use case | Risk if misused |
|---|---|---|---|
| Checkout started | Customer begins checkout | Funnel analysis, abandoned checkout reporting | Can overstate conversions if used as a sale |
| Checkout completed | Order is successfully completed | Purchase conversion tracking | Generally the correct event for ad attribution |
If your real goal is reducing checkout drop-off, not just tracking it, you may also want to read how to reduce abandoned carts in Shopify and discovering visitor behaviour on your Shopify store.
How does Shopify's sandboxed pixel environment affect tracking?
Shopify runs custom pixels in a sandboxed environment, which improves security and privacy but limits what your code can access. You can subscribe to standardised events, but you cannot rely on the same page-level access older scripts had.
In plain English, this means your code should be written to respond to Shopify events rather than poking around the checkout DOM. That is a good thing for stability, but it does break older snippets that assumed they could directly read page elements or inject arbitrary interface changes.
In my experience, merchants run into trouble when a third-party platform gives them a script written for generic websites and says, "just paste this into checkout". On Shopify, that instruction is often outdated. You need to translate the intent of the script into Shopify's supported event model.
Shopify checkout tracking in 2026 is event-based, not page-hack based.
How do I test whether my Shopify checkout conversion tracking is working?
The best way to test Shopify conversion tracking is to place a test order and verify the network request or event firing manually. Do not assume a saved script means a working conversion.
Here is the testing process I normally use:
- Create or use a test payment method in Shopify
- Place a real test order through the storefront
- Open browser developer tools and inspect the Network tab
- Look for the outbound request to Google, your affiliate platform, or your endpoint
- Check that value, currency, and transaction ID are populated correctly
- Confirm the conversion appears in the relevant platform after processing time
Shopify Pixel Helper can also help validate event behaviour, but I still prefer checking the actual network requests. It is more reliable when you are trying to diagnose whether the issue is in Shopify, the script logic, or the receiving platform.
If you are using Google tools, you may also want to verify tags with Google's support guidance and diagnostics. Just remember that GTM preview is not a perfect fit for Shopify's sandboxed customer events model.
What are the most common Shopify conversion tracking mistakes?
The most common mistakes are duplicate tracking, missing transaction IDs, and using outdated implementation methods. These errors can quietly distort your ad reporting for months.
These are the issues I see most often:
- Running multiple purchase tags at once through an app, a custom pixel, and legacy scripts
- Using cart values instead of final order values
- Omitting transaction IDs, which breaks deduplication
- Trusting old tutorials that still recommend Additional Scripts as the default path
- Not testing with a full order flow
- Confusing checkout_started with checkout_completed
One merchant I helped had Google Ads showing almost 40% more conversions than Shopify orders over the same period. The cause was simple: the official integration was active, a manual gtag purchase event was firing, and an old thank you page snippet had never been removed. The fix took 20 minutes. Finding the issue took much longer.
How do I migrate from legacy Shopify checkout scripts to Customer Events?
To migrate from legacy checkout scripts, identify every purchase-related tag currently firing, rebuild the required ones in Customer Events, test them, and then remove the old versions. The audit step is the most important part.
My recommended migration workflow looks like this:
- List every active tracking integration on your store
- Check whether each one is already handled by an app, such as Google & YouTube
- Identify any old Additional Scripts or thank you page snippets
- Recreate only the necessary custom logic in a custom pixel
- Run test orders and compare platform data
- Disable or remove legacy scripts to avoid duplication
Do not migrate blindly. If you simply copy old code into a new pixel without understanding what it does, you can end up preserving all the same reporting problems in a newer format.
Do I need Shopify Plus to add code to checkout?
No, not for conversion tracking via Customer Events. Shopify Plus is not required to add purchase tracking through custom pixels.
This is another area where older advice can be misleading. Historically, checkout customisation often led to discussions about Shopify Plus because of checkout.liquid access. But tracking via Customer Events is a different system. Standard Shopify plans can use customer events and custom pixels for supported use cases.
If your goal is visual or functional checkout customisation, that is a separate topic. But for checkout-only conversion tracking, most merchants do not need Plus.
What should I do if I only want to track the thank you page and nothing else?
If you only want thank you page style purchase tracking, subscribe only to checkout_completed and avoid other events. Keep the pixel narrow and purpose-built.
That means no page_view logic, no product event logic, and no extra checkout-step subscriptions unless you genuinely need them. Less tracking logic usually means fewer bugs, especially when multiple marketing tools are involved.
This approach is ideal for:
- Google Ads purchase conversions
- Affiliate sale notifications
- Basic revenue attribution
- Post-purchase reporting
If you want to control the post-purchase journey beyond tracking, such as where customers go after payment, this related guide on redirecting customers to a page after payment in Shopify may help.
My recommended setup for most Shopify stores in 2026
For most stores, the best setup is to use official integrations where possible and reserve custom pixels for gaps or advanced requirements. That gives you the best balance of reliability and flexibility.
My usual recommendation is:
- Use official apps for major platforms where available
- Use Customer Events custom pixels for custom purchase tracking
- Send transaction ID, value, and currency at minimum
- Test with a full order flow, not just a code save
- Remove any legacy scripts that duplicate the same conversion
In my experience building Shopify apps, the stores with the cleanest analytics setups are rarely the ones with the most tags. They are the ones with the fewest overlapping implementations and the clearest event ownership.
If you are also working on cart and checkout behaviour more broadly, you might find these useful:
Final implementation example for Shopify checkout-only conversion tracking
If you want a simple, modern, checkout-only tracking setup, this is the pattern to copy. It tracks a completed purchase and sends the key conversion values cleanly.
analytics.subscribe("checkout_completed", (event) => {
  /* Replace with your platform's tracking call */
  gtag('event', 'conversion', {
    'send_to': 'AW-123456789/AbCdEfGhIjKlMnOp',
    'transaction_id': event.data.checkout.order.id,
    'value': event.data.checkout.totalPrice.amount,
    'currency': event.data.checkout.currencyCode
  });
});
That is the modern Shopify answer to adding conversion tracking code to the checkout page only. Not theme edits, not checkout.liquid, and usually not Additional Scripts. Just a focused custom pixel tied to the right event.