

Für jeden Händler spielt der Shopify-Checkout-Prozess eine entscheidende Rolle dabei, Website-Besucher in zahlende Kunden zu verwandeln. Es ist wichtig, ein nahtloses und individuell angepasstes Checkout-Erlebnis zu bieten, um die Kundenzufriedenheit sicherzustellen und deinen Umsatz zu steigern. In diesem umfassenden Guide zeigen wir dir alles, was du über das Anpassen und Optimieren deines Shopify-Checkouts wissen musst.
Den Checkout anpassen
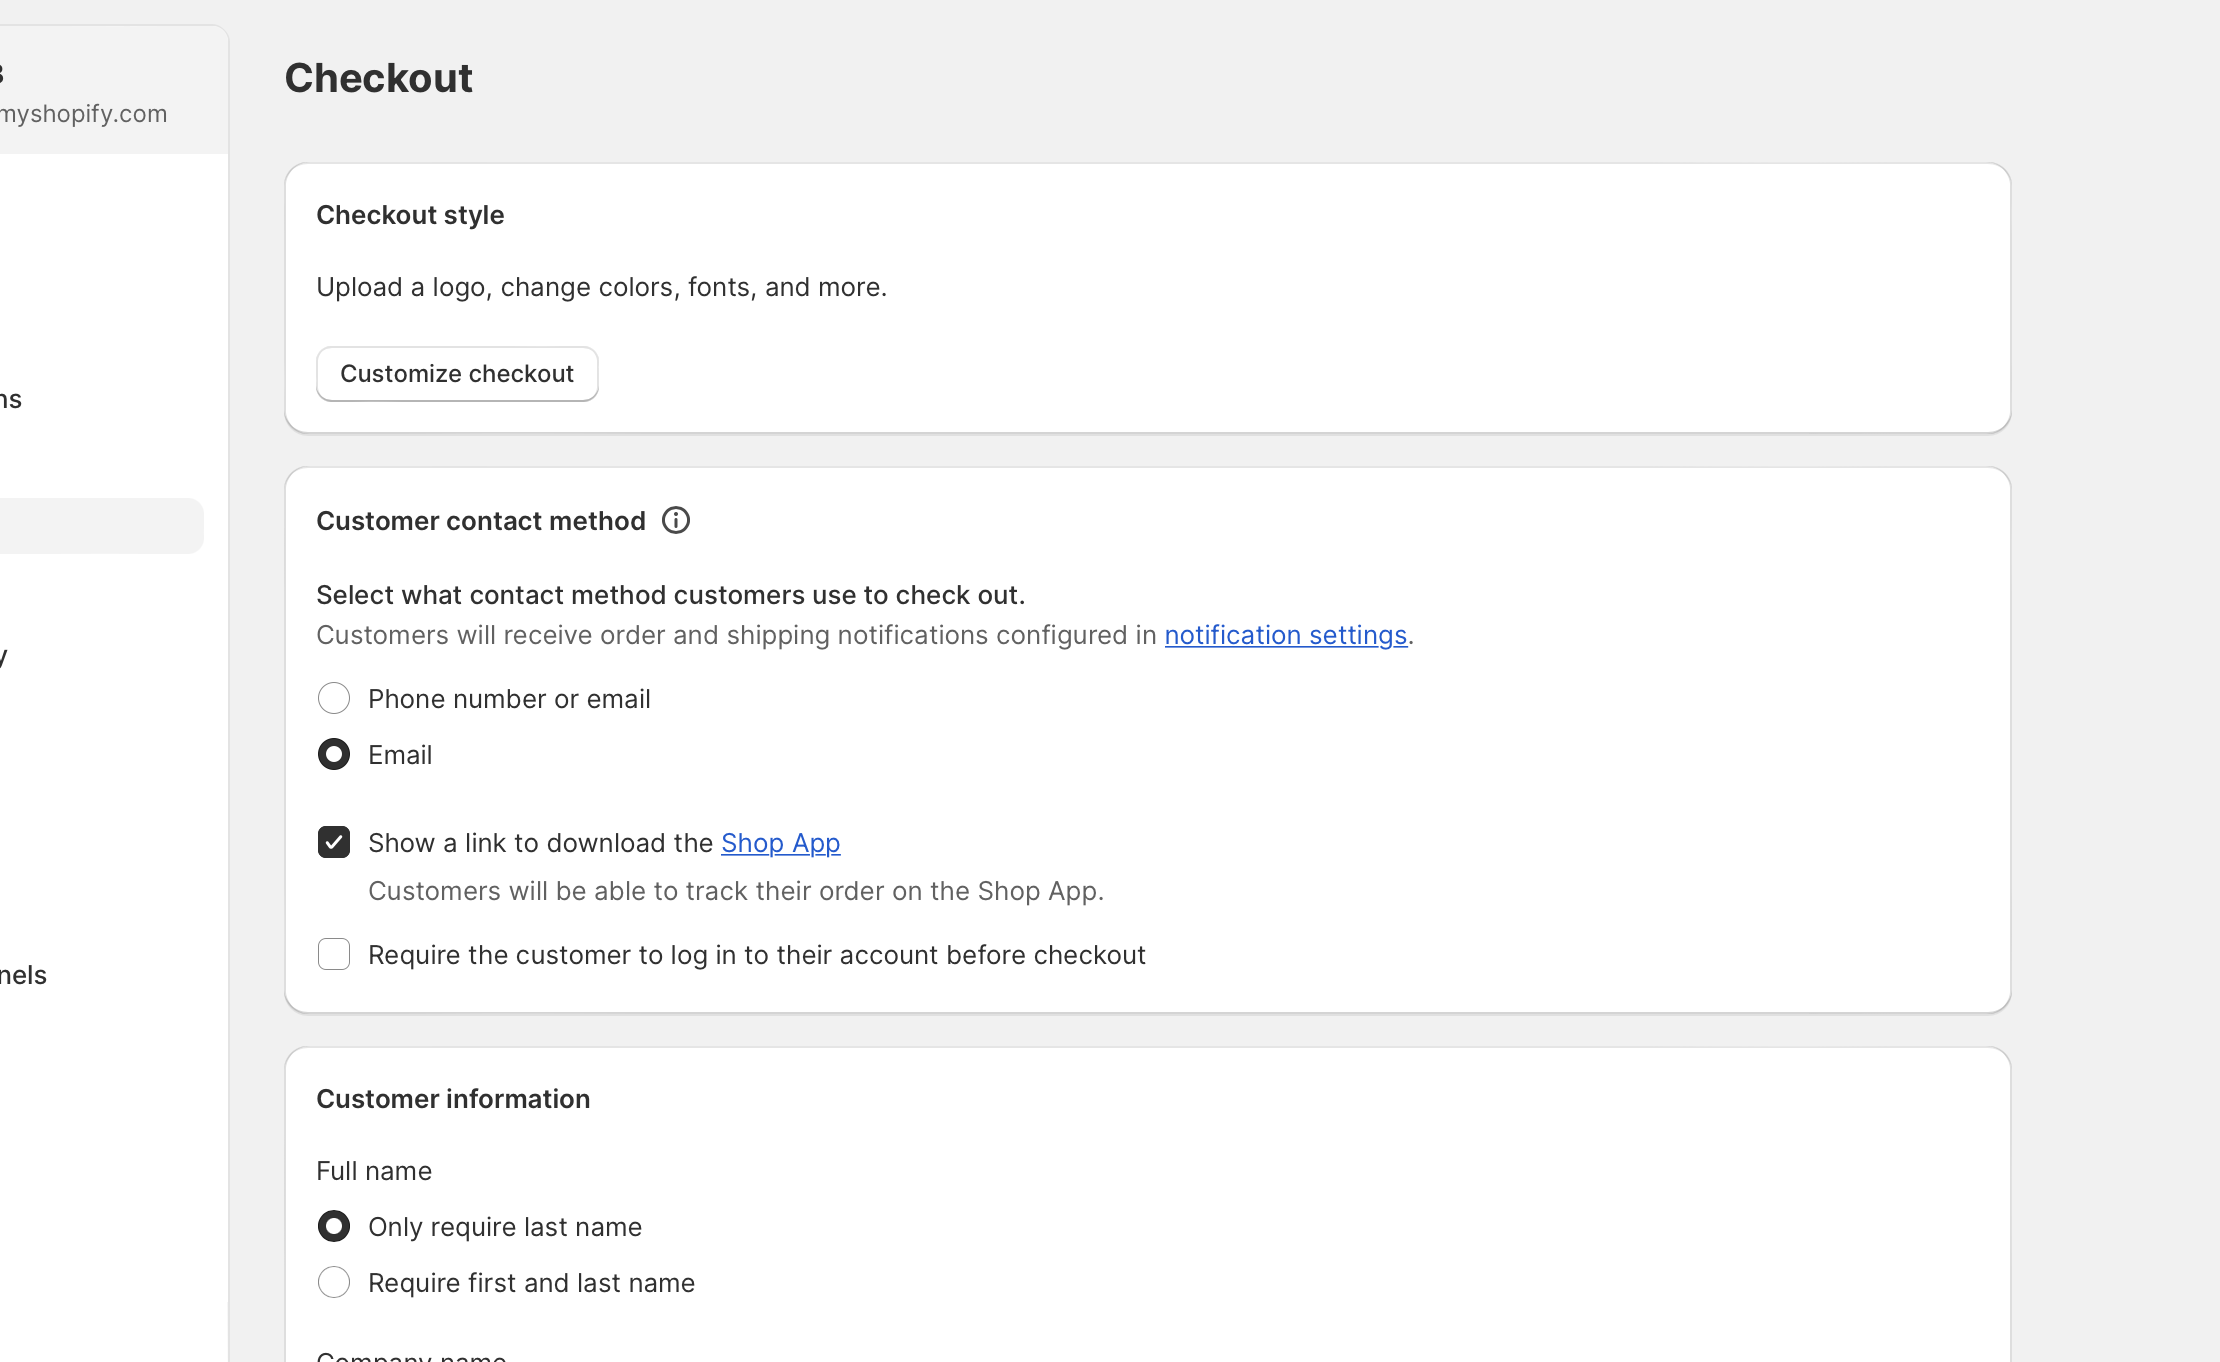
Einer der größten Vorteile von Shopify ist die Flexibilität, den Checkout-Prozess so anzupassen, dass er zum Look-and-Feel deiner Marke passt. Shopify nutzt inzwischen einen modernen Checkout- und Accounts-Editor, der Anpassungen einfacher und leistungsstärker macht als je zuvor. Um deinen Checkout anzupassen, gehe in deinem Shopify-Adminbereich zu Settings > Checkout. Klicke im Bereich „Configurations“ neben der Konfiguration, die du bearbeiten möchtest, auf Customize. Dadurch öffnet sich der Checkout- und Accounts-Editor, in dem du verschiedene Änderungen vornehmen kannst, darunter:
- Farben und Schriftarten anpassen, damit sie zur visuellen Identität deiner Marke passen.
- Dein Logo hochladen, um es auf der Checkout-Seite für bessere Wiedererkennung anzuzeigen.
- Ein Hintergrundbild oder eine Hintergrundfarbe für den Checkout-Header hinzufügen.
- Den Bereich der Bestellübersicht anpassen, um zusätzliche Informationen oder Aktionen hervorzuheben.
Nutze diese Anpassungsoptionen, um ein stimmiges und optisch ansprechendes Checkout-Erlebnis zu schaffen, das Vertrauen und Sicherheit bei deinen Kunden aufbaut. Der Checkout- und Accounts-Editor bietet dir einen zentralen Ort, um Checkout, Thank-you-Seiten, Bestellstatusseiten und Kundenkontoseiten unabhängig vom Theme-Editor zu verwalten.
Du kannst den Checkout außerdem mit Shopify-Checkout-Apps und Shopify Extensions erweitern. Shopify Extensions sind app-basiert, update-sicher und integrieren sich nahtlos in Shop Pay. Eine Liste unserer Top-Empfehlungen findest du hier.
Optionen für das Checkout-Formular bearbeiten
Im Checkout-Formular geben Kunden ihre persönlichen Daten ein, zum Beispiel Lieferadresse und Zahlungsdetails. Wenn du die Formularoptionen richtig konfigurierst, wird der Prozess für deine Kunden schneller und effizienter.
Gehe in deinem Shopify-Adminbereich zu Settings > Checkout > Abschnitt Customer Information. Hier kannst du Formularoptionen konfigurieren, Felder hinzufügen oder entfernen, Pflicht- oder optionale Felder festlegen und sogar zusätzliche Informationen abfragen, die für dein Business wertvoll sein können, etwa Präferenzen oder besondere Hinweise.
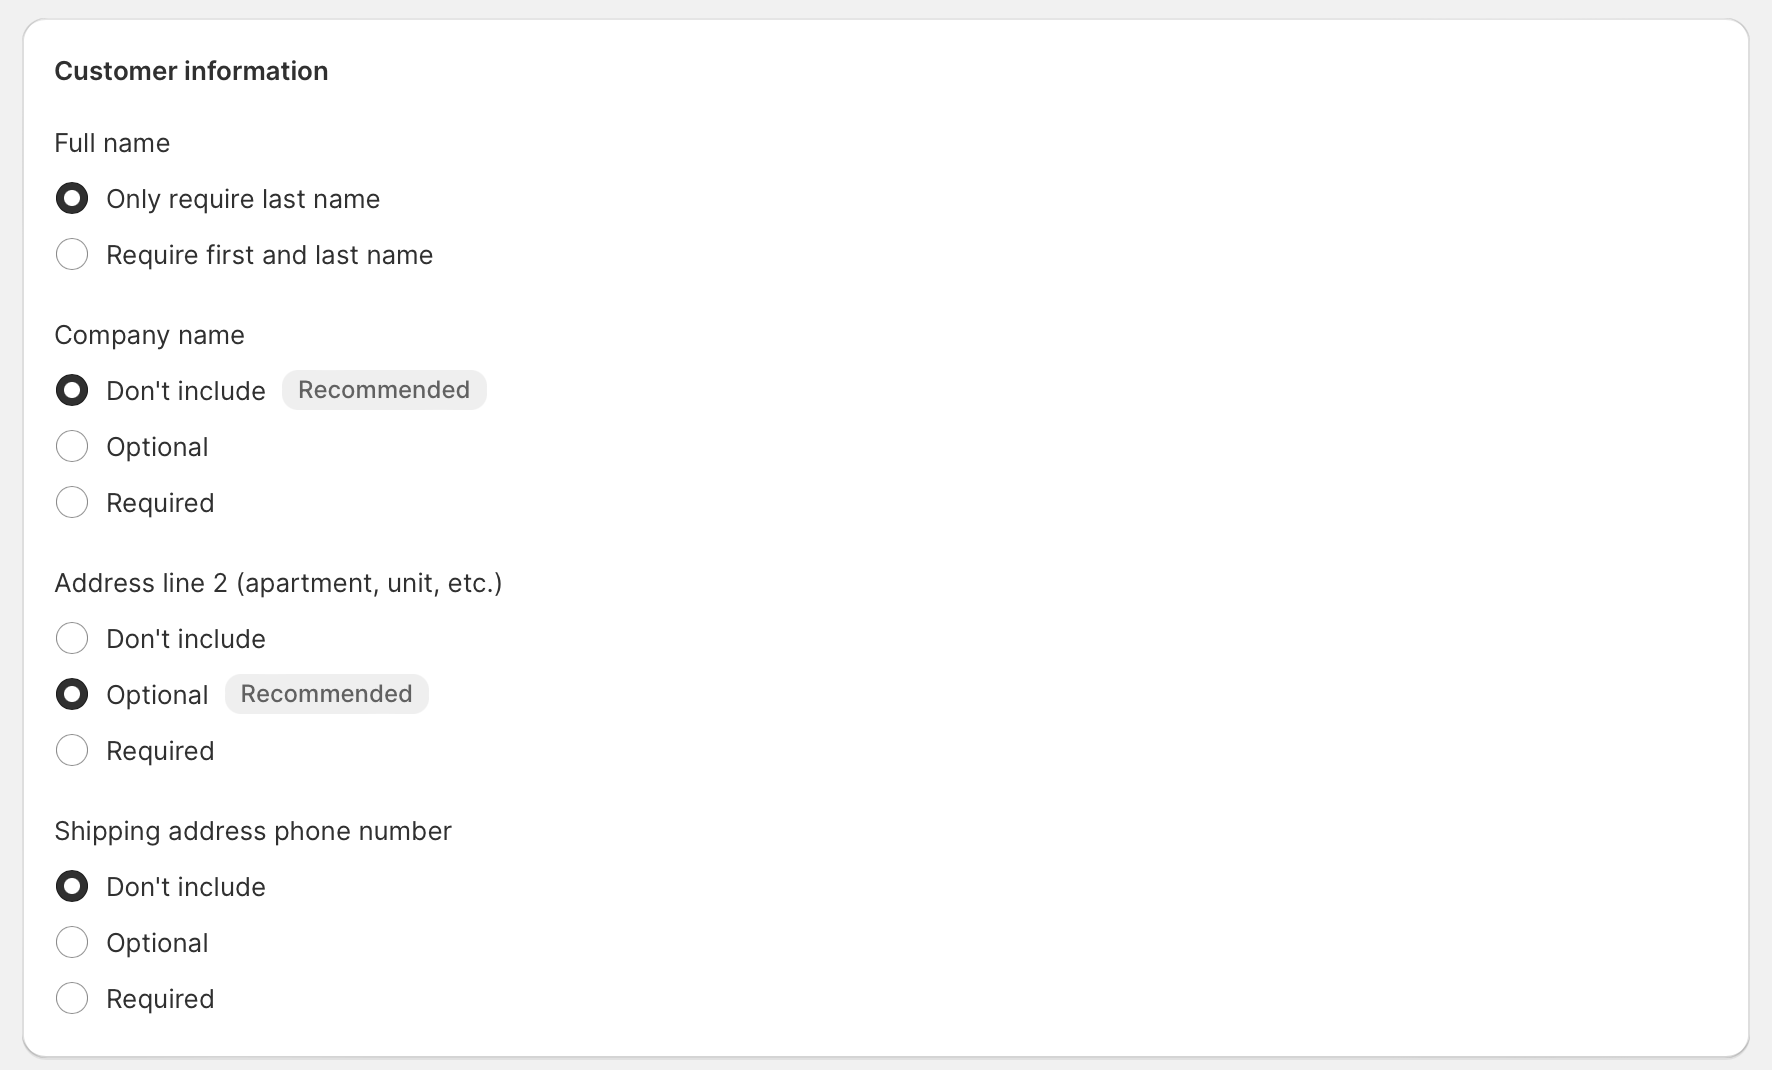
Achte darauf, nur wirklich notwendige Informationen abzufragen, denn ein zu langes Checkout-Formular kann Kunden davon abhalten, den Kauf abzuschließen. Für fortgeschrittene Anpassungen kannst du Checkout-Apps aus dem Shopify App Store nutzen, um benutzerdefinierte Felder, Validierungsregeln und bedingte Logik zu deinem Checkout-Formular hinzuzufügen.
Trinkgeldoptionen für Online-Bestellungen einrichten
Wenn du Kunden ermöglichen möchtest, bei Online-Bestellungen Trinkgeld zu geben, bietet Shopify eine einfache Möglichkeit zur Einrichtung. Trinkgeld kann besonders hilfreich für Unternehmen im Dienstleistungsbereich sein oder für Shops, die einen starken Fokus auf Wertschätzung gegenüber Kunden legen.
Um Trinkgeld zu aktivieren, gehe zu Settings > Checkout und scrolle zum Abschnitt Tipping. Dort kannst du Trinkgeld aktivieren und die Prozentsätze bzw. Optionen konfigurieren, die du Kunden anbieten möchtest. Du kannst aus vordefinierten Trinkgeld-Prozentsätzen wählen oder Kunden erlauben, einen individuellen Betrag einzugeben. Diese Funktion integriert sich nahtlos in deinen Checkout-Prozess, ohne dass eigener Code nötig ist.

Bestellverarbeitung und Archivierung einrichten
Ein optimiertes System für Bestellverarbeitung und Archivierung ist entscheidend, um effizient und organisiert zu bleiben. Shopify bietet hervorragende Tools, die dich dabei unterstützen.
Gehe in deinem Shopify-Adminbereich zu Settings > Checkout > Order processing. Hier kannst du Einstellungen wie Fulfillment-Standorte, die automatische Archivierung von Bestellungen für bessere Übersicht und sogar automatisierte Bestellbestätigungen oder Versandbenachrichtigungen konfigurieren, damit deine Kunden bei jedem Schritt informiert bleiben.
Shop-Richtlinien hinzufügen
Deine Shop-Richtlinien während des Checkout-Prozesses anzuzeigen, ist wichtig, um Kunden vor Abschluss des Kaufs über Bedingungen, Konditionen und Rückgaben zu informieren.
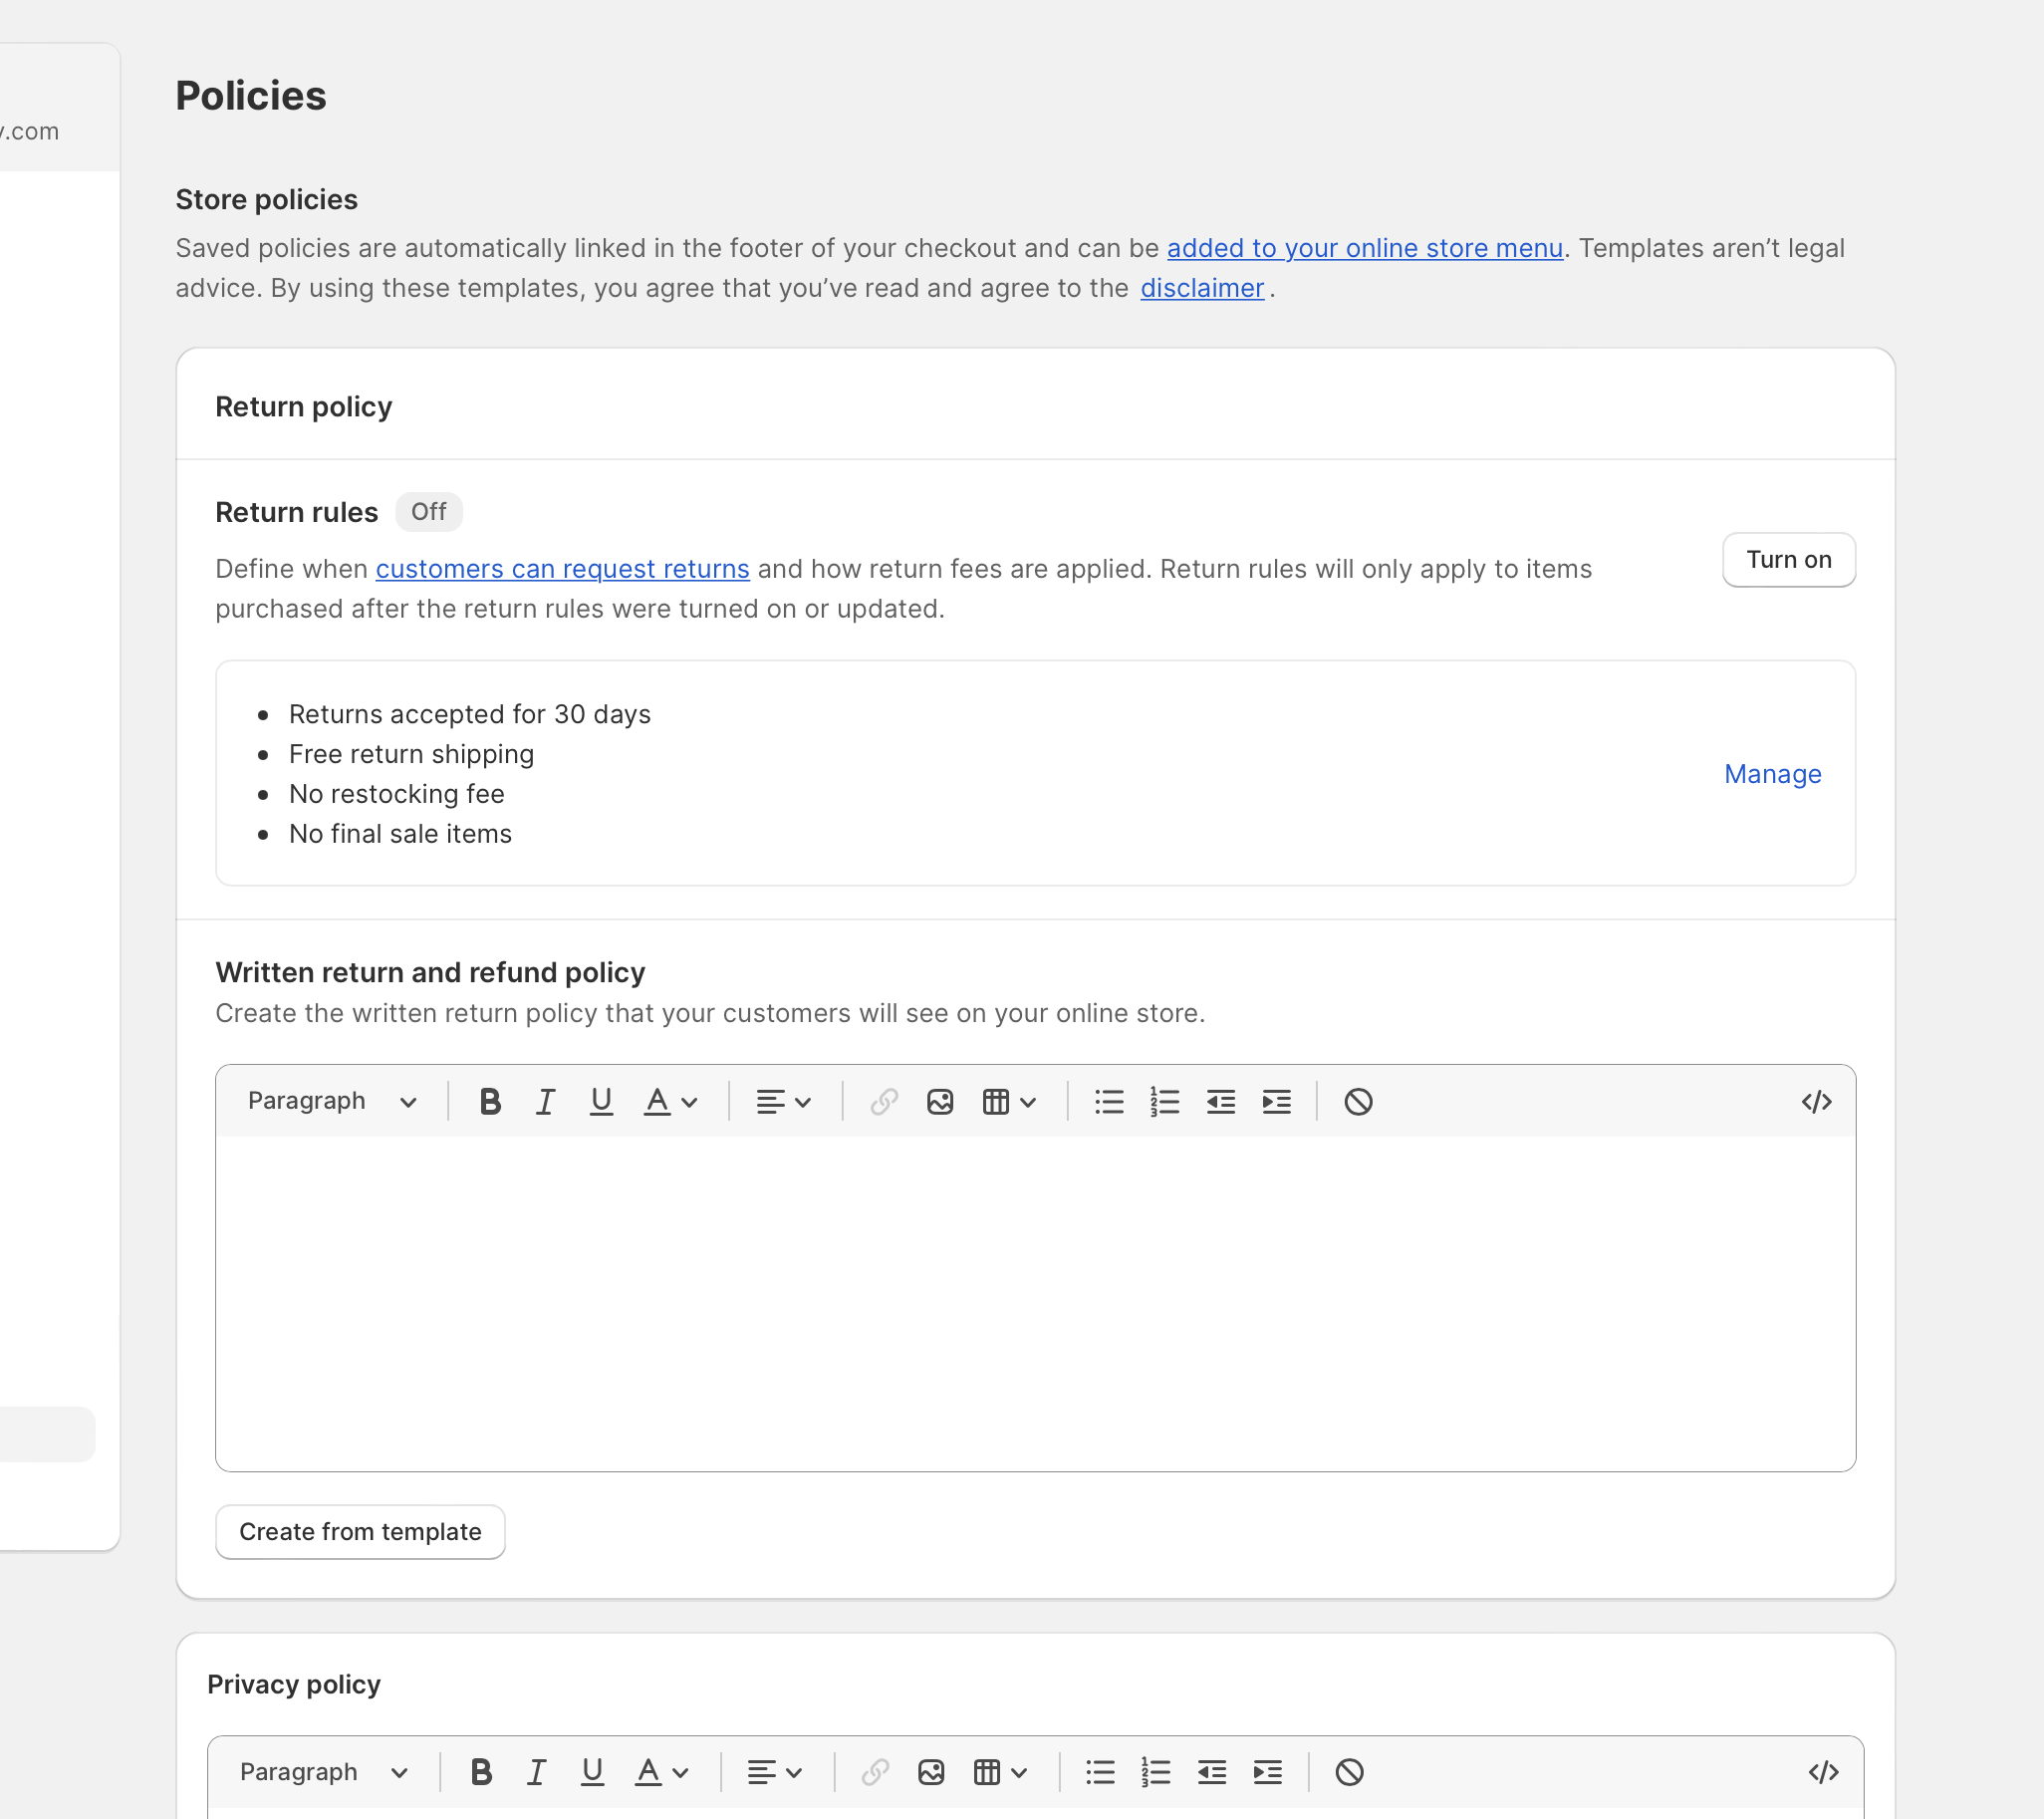
Um Shop-Richtlinien hinzuzufügen, gehe zu Settings > Policies. Von dort aus kannst du deine Rückerstattungsrichtlinie, Datenschutzerklärung, Nutzungsbedingungen und Versandrichtlinie ganz einfach erstellen und bearbeiten. Diese Richtlinien werden während des Checkout-Prozesses automatisch angezeigt und sind zugänglich – das stärkt Vertrauen und Transparenz gegenüber deinen Kunden. Shopify stellt außerdem Vorlagen für Richtlinien bereit, damit du schnell starten kannst, falls du deine Richtlinien noch nicht erstellt hast.
Zahlungsmethoden und Lieferoptionen im Checkout anpassen
Verschiedene Zahlungsmethoden und Lieferoptionen im Checkout anzubieten, kann die Nutzererfahrung deutlich verbessern und die Conversion-Rate erhöhen. Shopify bietet umfangreiche Möglichkeiten, diese Optionen passend zu den individuellen Anforderungen deines Unternehmens zu konfigurieren.
Gehe zu Settings > Payments, um deine Zahlungsoptionen zu verwalten. Du kannst aus verschiedenen Payment-Gateways wählen, z. B. PayPal, Stripe oder Shopify Payments, und Express-Checkout-Optionen wie Shop Pay, Apple Pay und Google Pay aktivieren. Für Lieferoptionen gehe zu Settings > Shipping and delivery, um bestimmte Versandarten oder Tarife basierend auf Gewicht, Größe oder Zielort deiner Produkte zu konfigurieren.
Für fortgeschrittene Anpassungen von Zahlungs- und Lieferoptionen kannst du Apps zur Zahlungs- und Versand-Anpassung aus dem Shopify App Store installieren. Mit diesen Apps kannst du Zahlungsmethoden und Lieferoptionen ausblenden, neu anordnen, umbenennen oder abhängig von bestimmten Regeln bedingt anzeigen. Beachte, dass einige erweiterte Anpassungsfunktionen für Checkout-Seiten (Informations-, Versand- und Zahlungsseiten) nur für Shopify Plus-Händler verfügbar sind.
Eine Testbestellung aufgeben
Bevor du deine neuen Checkout-Einstellungen live schaltest, ist es immer sinnvoll, den Checkout-Prozess zu testen, um sicherzustellen, dass alles reibungslos funktioniert.
Um eine Testbestellung aufzugeben, gehe in deinen Shopify-Adminbereich und wähle ein Produkt aus. Lege es in den Warenkorb, gehe zur Kasse und simuliere eine Transaktion mit dem Testmodus von Shopify oder über ein Test-Payment-Gateway. So erlebst du den gesamten Prozess aus Kundensicht und kannst mögliche Verbesserungsbereiche erkennen. Du kannst deine Checkout-Anpassungen außerdem direkt im Checkout- und Accounts-Editor in der Vorschau ansehen, bevor du sie veröffentlichst.
Fazit
Zusammenfassend lässt sich sagen: Deinen Shopify-Checkout-Prozess anzupassen und zu optimieren, ist ein entscheidender Schritt, um die Kundenzufriedenheit zu verbessern, Conversions zu steigern und deinen Gesamtumsatz zu erhöhen. Mit dem modernen Checkout- und Accounts-Editor von Shopify und der Power von Shopify Extensions hast du mehr Flexibilität als je zuvor, um ein nahtloses, markenkonformes und benutzerfreundliches Checkout-Erlebnis zu schaffen. Wenn du die in diesem Guide beschriebenen Schritte befolgst, hast du alles, was du brauchst, um deinen Checkout auf Erfolg zu optimieren. Denke daran, deinen Checkout-Prozess kontinuierlich zu überwachen und zu verfeinern, damit er zu den sich wandelnden Bedürfnissen und Vorlieben deiner Kunden passt – und nutze das wachsende Ökosystem an Checkout-Apps im Shopify App Store.