
If you are trying to work out how to add a new shipping carrier in Shopify, the short answer is this: you can add supported third-party carrier accounts in Shopify admin, but only if your store has access to carrier-calculated shipping. If your carrier is not natively supported by Shopify, you usually need a shipping app or a custom integration.
I have worked with enough Shopify merchants to know this topic gets confusing fast, because people often mean two different things when they say “add a carrier”. They might mean buying labels from a carrier inside Shopify, or they might mean showing that carrier’s live rates at checkout. Shopify supports both in some cases, but not for every carrier and not on every plan.
This guide covers the practical reality in 2026: what Shopify supports natively, what plan you need, how to connect a carrier account, how to add carrier-calculated rates to shipping zones, and what to do when your preferred freight or niche courier is not on Shopify’s built-in list.
Can you add any shipping carrier to Shopify?
No, you cannot add just any carrier directly to Shopify’s built-in carrier list. You can connect supported carrier accounts and use supported carrier-calculated rates, but custom or niche carriers usually require an app or bespoke integration.
This is the biggest gap I see between what merchants expect and what Shopify actually allows. Shopify has a set of supported shipping carriers and a separate workflow for buying shipping labels. If your carrier is outside that ecosystem, you are not going to magically add it from a dropdown and be done in five minutes.
In my experience building Shopify apps, this is especially common for LTL freight, regional couriers, white-glove delivery providers, and logistics companies in markets where Shopify’s native carrier support is limited. That is where apps like Advanced Shipping Rate Manager and Advanced Shipping Rules become useful.
What do you need before adding a shipping carrier in Shopify?
You need the right Shopify plan, an eligible carrier account, and accurate product shipping data. Without those three things, your rates will either not show at checkout or they will be wildly inaccurate.
According to Shopify’s current documentation, third-party carrier-calculated shipping is typically available on Advanced Shopify and Shopify Plus. If you are on a lower plan, you may need to upgrade before you can connect a carrier account and surface live rates at checkout.
You also need your carrier account credentials ready. That usually includes an account number, API or authentication details, and sometimes a separate approval step with the carrier. Finally, make sure your products have correct weights and, where relevant, dimensions. If you sell bulky items, this matters more than almost anything else.
Prerequisites checklist
The setup is much easier if you prepare everything before touching Shopify settings. I recommend checking these items first.
- Shopify plan with carrier-calculated shipping enabled
- Carrier account with UPS, FedEx, DHL, USPS, or another supported provider
- Accurate product weights for every shippable item
- Package dimensions if your carrier uses dimensional weight
- Shipping zones already defined in Shopify
- A test address for each main market you ship to
If you sell awkward, oversized, or restricted products, I would also review your packaging setup and shipping rules before going live. If that is relevant, my guides on assigning boxes for shipping to products in Shopify and restricting shipping countries on certain products are worth reading next.
How do I add a supported carrier account in Shopify?
To add a supported shipping carrier in Shopify, go to Settings, open Shipping and delivery, add the carrier account, and test the connection. After that, you still need to assign carrier-calculated rates to the relevant shipping profile and zone.
This is the part many tutorials skip. Adding the account itself is only step one. Connecting a carrier does not automatically make its rates appear at checkout. You also need to attach those rates to your shipping setup.
Step 1: Open Shipping and delivery settings
Go to Shopify admin and open the shipping settings area. This is where carrier accounts, shipping profiles, and rates all live.
- Log in to your Shopify admin.
- Go to Settings > Shipping and delivery.
- Look for sections such as Carrier accounts, Shipping, and Shipping profiles.
Shopify’s own help docs on setting up shipping zones and rates and understanding shipping carriers are useful references here if your admin looks slightly different.
Step 2: Add your carrier account
Choose Add Carrier, select the provider, and enter your account credentials. If your carrier is supported, Shopify will prompt you for the information needed to authenticate the connection.
- In Carrier accounts, click Add Carrier.
- Select your carrier, such as UPS, FedEx, or DHL.
- Enter the required credentials and account details.
- Save the connection.
If you do not see your carrier listed, that usually means one of two things: either your plan does not support the feature, or Shopify does not natively support that carrier. In that case, skip ahead to the app-based methods below.
Step 3: Test the carrier connection
Always test the account before you rely on it at checkout. A carrier can appear connected but still fail because of incorrect credentials, unsupported services, or missing package data.
- Next to the connected carrier, click Test account if the option is available.
- Enter a sample destination, package weight, and dimensions.
- Confirm that valid services and rates are returned.
In my experience, this is where merchants catch the most issues. The most common problems are incorrect units, missing product weights, and carrier account permissions that are not enabled for rating APIs.
How do I show the new carrier's rates at checkout?
After connecting the carrier, you need to add carrier-calculated rates to a shipping profile and zone. Until you do that, customers will not see those rates during checkout.
This is the practical workflow I recommend for most stores.
- Go to Settings > Shipping and delivery.
- Under Shipping profiles, choose the profile you want to edit.
- Select the relevant shipping zone.
- Click Add rate.
- Choose Use carrier or app to calculate rates.
- Select the connected carrier and the services you want to offer.
- Add any handling fee or adjustment if needed.
- Click Done and then Save.
Once you have done that, place a test order and check the available rates at checkout. I strongly suggest testing multiple postcodes, especially if you have remote area surcharges, oversized items, or mixed carts.
If you want to make shipping messaging clearer earlier in the journey, you might also want to read my guide on how to show shipping on the product page in Shopify.
What is the difference between Shopify Shipping, preferred carriers, and third-party carrier accounts?
Shopify Shipping, preferred carriers, and third-party carrier accounts are related, but they are not the same thing. Understanding the difference helps you pick the right setup faster.
I see merchants mix these up all the time, especially when reading Shopify help docs and community threads side by side. Here is the simplest way to think about it.
| Option | What it does | Best for | Main limitation |
|---|---|---|---|
| Shopify Shipping | Lets you buy labels in Shopify using supported carrier partnerships | Stores using common carriers in supported regions | Carrier choice depends on location and Shopify support |
| Preferred carriers | Reorders the carriers and services shown first when buying labels | Merchants who already use supported carriers regularly | Does not add new carriers to Shopify |
| Third-party carrier accounts | Connects your own eligible carrier account for live rates | Stores needing negotiated rates or specific carrier services | Requires compatible plan and supported carrier |
| Shipping apps | Adds custom logic, niche carriers, freight rules, or advanced rate control | Complex shipping setups, freight, oversized items | Extra monthly cost and setup time |
Shopify also has a help article on setting up preferred carriers. That feature is useful, but it is not the same as adding a new carrier to your checkout.
What if my carrier is not supported by Shopify?
If your carrier is not supported natively, the best option is usually a shipping app or a custom integration. You cannot manually force a completely new carrier into Shopify’s default carrier list.
This is where many merchants hit a wall. They search for “how to add my company to the shipping carrier list” and assume there is a hidden admin setting. There usually is not. Even Shopify community responses point merchants towards apps or custom app development instead.
In my experience, this is especially true for freight carriers, regional delivery firms, and businesses that need very specific rating logic based on SKU, postcode, pallet count, product tags, or split shipments.
What is the best app for adding a custom shipping carrier in Shopify?
The best app depends on whether you need carrier connections, advanced rule logic, or freight-style calculations. For most complex shipping setups, I would shortlist Advanced Shipping Rate Manager and Advanced Shipping Rules.
Both apps are built for merchants who have gone beyond simple flat-rate shipping. If you sell furniture, appliances, made-to-order products, or mixed carts with restrictions, these tools can save a lot of manual work.
1. Advanced Shipping Rate Manager
Advanced Shipping Rate Manager is best for stores that need hybrid shipping logic, freight support, and item-level control. It is a strong fit for merchants shipping large or awkward products.
Advanced Shipping Rate Manager lets you create your own shipping rules across different methods and rate sources. That means you can combine carrier logic with your own business rules instead of relying on Shopify’s default setup alone.
![]()
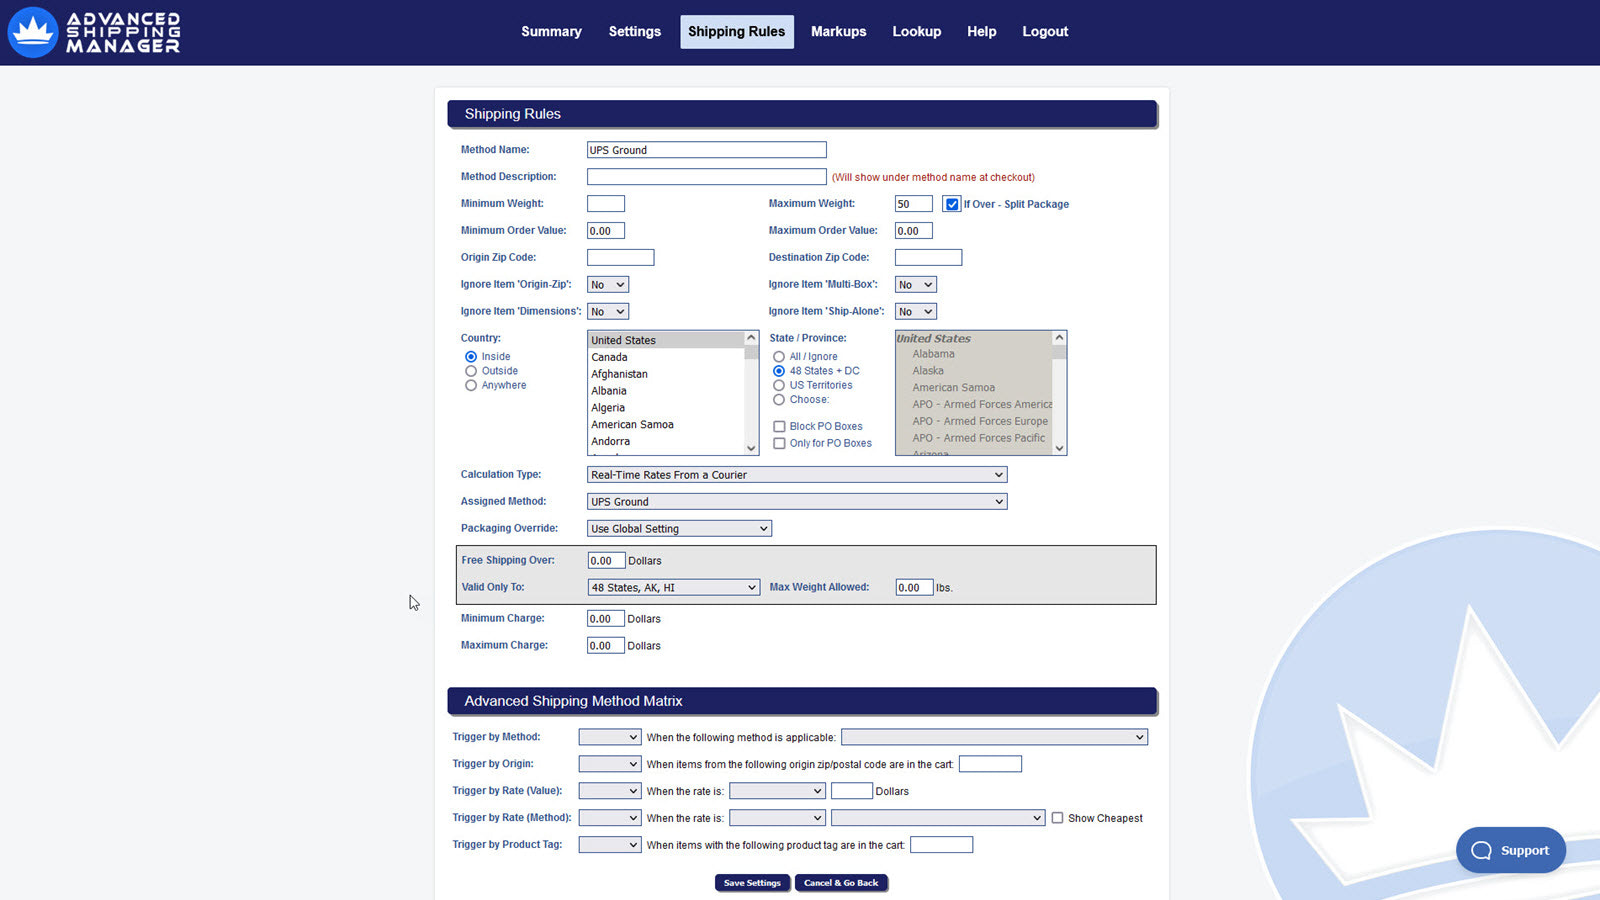
One thing I like here is the app’s support for freight couriers and more complex packaging scenarios. If a product needs to ship in multiple boxes, or if you need to calculate rates at an item level, this type of app is often the only realistic way to keep checkout accurate.
The app listing has historically been very well reviewed, and it is particularly useful if you need to show estimated delivery timing alongside rates. That can improve conversion because customers are not just choosing on price, they are choosing on certainty too.
If delivery messaging matters to your store, you might also want to read my related post on creating an Amazon Prime or express shipping programme for your Shopify store.
- Best for: Freight, oversized items, hybrid rate logic
- Useful features: Multi-box shipping, item-level processing, delivery estimates, shipping method blocking
- Verdict: Best for complex shipping setups
2. Advanced Shipping Rules
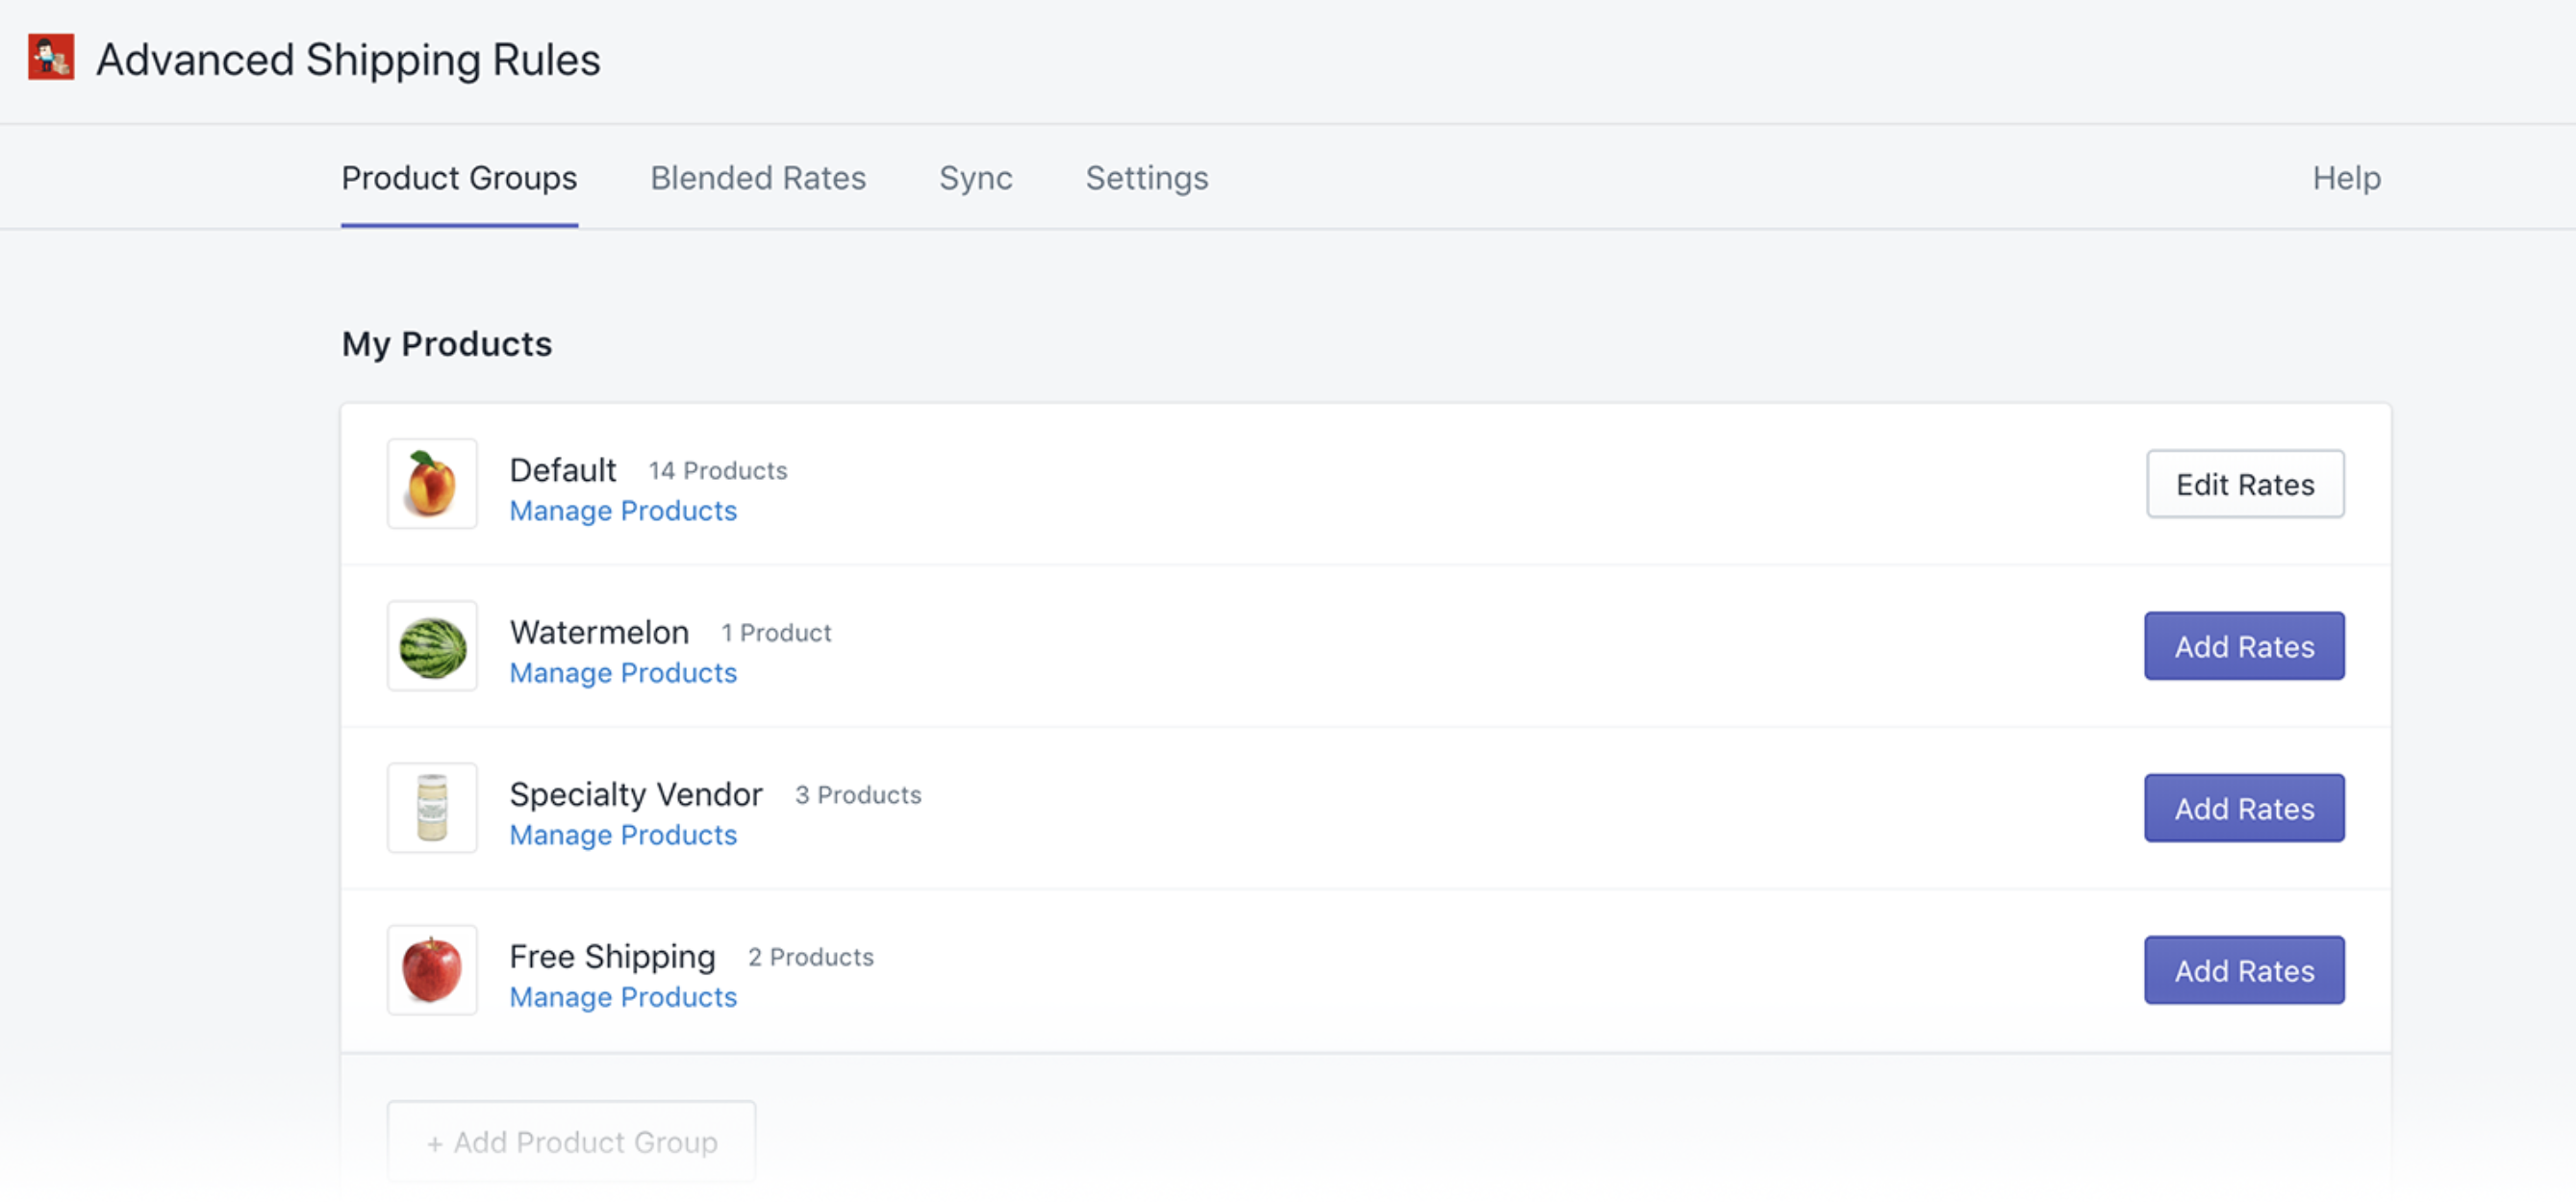
Advanced Shipping Rules is best for merchants who need precise conditional logic for shipping rates. It is ideal when you want to show, hide, add, or adjust rates based on detailed cart conditions.
Advanced Shipping Rules gives you much finer control over shipping behaviour than Shopify offers out of the box. In practice, that means you can change rates based on postal codes, SKUs, tags, product groups, and plenty more.
![]()
This is the kind of app I recommend when a merchant says something like, “I want free shipping on accessories, but only in the UK, unless the cart also contains a hazardous item, and bulky products need a surcharge by postcode.” Shopify’s native tools are rarely enough for that.
Key features include real-time carrier rates, custom rate titles, area restrictions, package settings, and advanced calculations such as per item, per pound, percentage of product price, and combined rates. Good support matters with shipping apps, and this one has built a strong reputation there.
- Best for: Conditional logic and detailed rate control
- Useful features: Hide and show rates, postcode rules, product restrictions, custom titles
- Verdict: Best for rule-heavy stores
App comparison table
If you are choosing between the two apps, the main difference is shipping complexity versus shipping logic. Both are strong, but they solve slightly different problems.
| App | Best use case | Strength | App Store |
|---|---|---|---|
| Advanced Shipping Rate Manager | Freight, multi-box, large-item shipping | Hybrid rates and item-level shipping logic | View app |
| Advanced Shipping Rules | Conditional shipping rules by product or destination | Very flexible rate visibility and calculation logic | View app |
What are the benefits of adding a new shipping carrier in Shopify?
Adding a new carrier can improve rate accuracy, customer choice, and operational flexibility. It is often the difference between profitable shipping and quietly losing money on every bulky order.
The original reason most merchants look into this is simple: their current shipping setup does not match their products. If you sell furniture, electricals, custom bundles, or heavy B2B orders, a basic parcel carrier setup is often too limited.
- Expanded shipping options - Offer services that suit heavy, oversized, or specialist deliveries.
- Improved customer satisfaction - Show more accurate rates and delivery times at checkout.
- Cost efficiency - Use the most suitable carrier for different order types instead of overpaying with one-size-fits-all shipping.
- Operational flexibility - Apply different rules for different products, destinations, or package types.
- Better inventory and fulfilment handling - Support multi-box shipments and item-level calculations.
- Regulatory compliance - Restrict certain products or services by region where needed.
From a conversion point of view, accurate shipping is underrated. Unexpected delivery costs are still one of the biggest reasons shoppers abandon checkout. Even a modest improvement in shipping clarity can help protect your conversion rate.
How do I troubleshoot carrier rates not showing in Shopify?
If carrier rates are not appearing, the issue is usually your plan, your shipping profile, your product data, or your carrier connection. Start there before assuming Shopify is broken.
Here is the troubleshooting checklist I use most often.
- Check your plan - Make sure carrier-calculated shipping is available on your subscription.
- Verify the carrier account - Re-test credentials and permissions.
- Review shipping profiles - Confirm the correct products are in the correct profile.
- Check shipping zones - The customer’s address must fall inside a configured zone.
- Confirm product weights - Missing weights can break rate calculations.
- Check package dimensions - Especially important for dimensional carriers and freight.
- Look for conflicting app rules - Another shipping app may be hiding or overriding rates.
- Run a live checkout test - Test with a real product and a real destination.
If you need to present extra delivery information around checkout, I have also written about adding text next to the shipping method on the shipping page and splitting orders into multiple shipments in Shopify. Those two issues often come up alongside carrier setup.
Can you add FedEx, UPS, DHL or USPS to Shopify?
Yes, in many cases you can connect major carriers like FedEx, UPS, DHL, and USPS to Shopify, depending on your region, plan, and account eligibility. These are among the most commonly supported carriers in Shopify’s ecosystem.
That said, support varies by country and fulfilment location. Shopify’s own carrier documentation is the best place to confirm current availability for your market, especially if you are outside the US, Canada, or major supported regions.
Useful references include Shopify’s pages for FedEx, UPS, and the broader shipping carriers overview.
If your question is specifically “Can I add my own local courier to Shopify?”, the answer is usually not natively. You will generally need an app or a custom-built connector.
Should you use Shopify's native carrier setup or an app?
Use Shopify’s native setup if your needs are simple and your carrier is supported. Use an app if you need freight logic, postcode restrictions, split shipments, product-level rules, or unsupported carriers.
This is my honest view after years around Shopify merchants and app workflows. Native Shopify shipping is good for straightforward stores. It is clean, fast, and easier to maintain. But once your catalogue or fulfilment logic gets messy, an app often pays for itself quickly by preventing undercharged shipping and support headaches.
| Scenario | Best option |
|---|---|
| You ship standard parcels with major carriers | Shopify native carrier setup |
| You have negotiated rates with a supported carrier | Third-party carrier account in Shopify |
| You ship furniture, freight, or oversized products | Shipping app |
| You need postcode, SKU, or tag-based shipping logic | Shipping app |
| You want to connect a niche or unsupported courier | App or custom integration |
Alternative method: can a Shopify developer add a custom shipping carrier?
Yes, a Shopify developer can build a custom integration, but it is usually only worth it for larger stores or very specific logistics needs. For most merchants, an existing app is faster and cheaper.
The original post touched on this, and it is still true. If you do not want to use an app, you can work with a Shopify developer or agency to build a custom carrier service integration. That route makes sense when your shipping logic is proprietary, your carrier has an API but no Shopify app, or your business needs full control over rating behaviour.
As an app developer myself, I would only recommend custom development if one of these is true:
- You have a high order volume and app costs are less relevant than operational efficiency
- You use a specialist logistics provider with a usable API
- You need custom checkout rate logic that existing apps cannot handle cleanly
- You want the integration to connect with internal systems like ERP, WMS, or fulfilment software
For everyone else, start with a proven app, test the checkout experience, and only commission custom work if you hit real limitations.
What is my recommended setup for most Shopify stores?
For most stores, the best approach is to use Shopify’s native carrier setup first, then add a shipping app only if your requirements outgrow it. That keeps your setup simpler and reduces unnecessary costs.
If you sell standard products with standard parcel shipping, connect a supported carrier account, assign the rates to your shipping zones, and test thoroughly. If you sell large, heavy, restricted, or multi-box items, move straight to an app like Advanced Shipping Rate Manager or Advanced Shipping Rules.
That is the route I would take myself if I were launching a store today. Start simple, validate the checkout experience, then add complexity only when it is clearly justified by your products and fulfilment model.