

Shopify does not natively let you manually approve new customer accounts upon creation. If you want to review signups before customers get access, you will need either a third-party approval app or a workaround using forms and tags.
I have worked with enough Shopify stores to know this catches merchants out all the time, especially wholesalers, trade-only brands, and stores that hide pricing until a customer is vetted. Shopify's built-in customer accounts are improving, particularly with new customer accounts, but manual approval is still not a native feature.
So if you came here looking for a hidden Shopify setting called something like "approve accounts before activation", the short answer is simple: it does not exist in Shopify admin. The practical answer is that there are several reliable ways to get the same result.
Can Shopify approve customer accounts manually by default?
No, Shopify cannot manually approve new customer accounts by default. To approve or deny registrations before granting access, you need an app such as Addify - Approve New Customers or a custom registration workflow.
This is consistent with what Shopify's own documentation and community discussions imply. Customer accounts support sign-in, profile management, and order history, but they do not include a built-in approval queue for new signups.
In my experience building Shopify apps, this gap matters most for B2B stores, wholesale catalogues, and brands that need to verify resellers, clinics, schools, or trade buyers before showing prices. It also comes up for members-only stores and any business trying to reduce spam registrations.
Why would you want to approve customer accounts before they can access your store?
The main reason is control. Manual approval lets you verify who gets access to your products, prices, collections, and checkout.
That control can be commercially important. If you sell trade-only, offer account-specific pricing, or have restricted products, approving customers before they gain access helps keep your store organised and protects margins.
- Wholesale verification - confirm a customer is a legitimate business before revealing trade prices
- Spam reduction - stop low-quality or fake signups cluttering your customer list
- Exclusive access - restrict launches, private collections, or members-only products
- Better segmentation - tag approved customers as retailer, distributor, VIP, or stockist
- Compliance and documentation - collect VAT numbers, company names, or licences before approval
This is also useful if you plan to automate follow-up actions with tags, flows, or email sequences. Once an account is approved, you can trigger access rules, send onboarding emails, or apply customer-specific discounts. If that is relevant to your setup, my guide on applying automatic discounts to tagged customers in Shopify is worth a look.
What is the best way to approve customer accounts upon creation in Shopify?
The best method is to use a dedicated customer approval app. It is the most reliable option, the least fragile, and the easiest to maintain as your store grows.
You can absolutely create a manual workaround with a contact form or membership request form. But if approvals are central to how your store operates, an app is usually the better long-term choice because it gives you a proper review queue, notifications, tagging, and approval emails.
Below is a quick comparison of the main approaches.
| Method | Best for | Pros | Cons |
|---|---|---|---|
| Approval app | B2B, wholesale, restricted-access stores | Structured workflow, approval queue, emails, tags, faster scaling | Monthly app cost |
| Request membership form | Small stores with low signup volume | Cheap, simple, no complex setup | Manual admin work, no true approval pipeline |
| Lock content with tags | Stores that only need access restriction | Flexible access control for pages, products, and prices | Does not replace a full approval registration workflow on its own |
Which Shopify apps can approve or deny new customer registrations?
Several Shopify apps can handle account approval workflows. The most relevant options for this use case are Addify, Enhance, ES Customer Approval, and Locksmith for access control.
I would separate these into two groups. The first group includes true approval apps built specifically to review and approve signups. The second group includes access control apps that restrict what customers can see after you tag or approve them.
Addify - Approve New Customers
Addify is one of the clearest app-store options for manual approval. It is designed specifically for reviewing registrations and approving or disapproving customers based on your rules.
![]()
You can find it here: Addify - Approve New Customers. Based on the latest app listing data, pricing starts from $2.99/month and there is a free trial available.
What stands out is the ability to review pending registrations, approve or reject users, and apply customer tags such as wholesaler or retailer. That makes it useful if you want to split approved accounts into segments from day one.
It also supports custom status notifications, including pending, approved, and denied messaging. For merchants who need a low-cost, purpose-built tool, this is usually the first app I would test.
Enhance: Approve New Customers
Enhance is another app focused on validating new customer registrations. It is best suited to stores that want a straightforward approval layer without building a custom process.
![]()
You can view it here: Enhance: Approve New Customers. The core appeal is that it keeps the process simple: registrations are held for review, then customers are updated by email based on your decision.
If you do not need a lot of advanced B2B form logic, this type of app can be easier to implement than a more customisable form builder. That matters if you want to get live quickly and avoid overcomplicating the signup flow.
ES Customer Approval
ES Customer Approval is a stronger fit when you need more data during signup. It is particularly relevant for stores that need to collect detailed business information or supporting documents.
![]()
You can see the listing here: ES Customer Approval. In practical terms, this is more useful when your approval process is not just yes or no, but includes checks like VAT number, company registration, reseller type, or uploaded documents.
That extra data can be valuable if your team has to vet applications manually. It reduces back-and-forth and helps you make approval decisions faster.
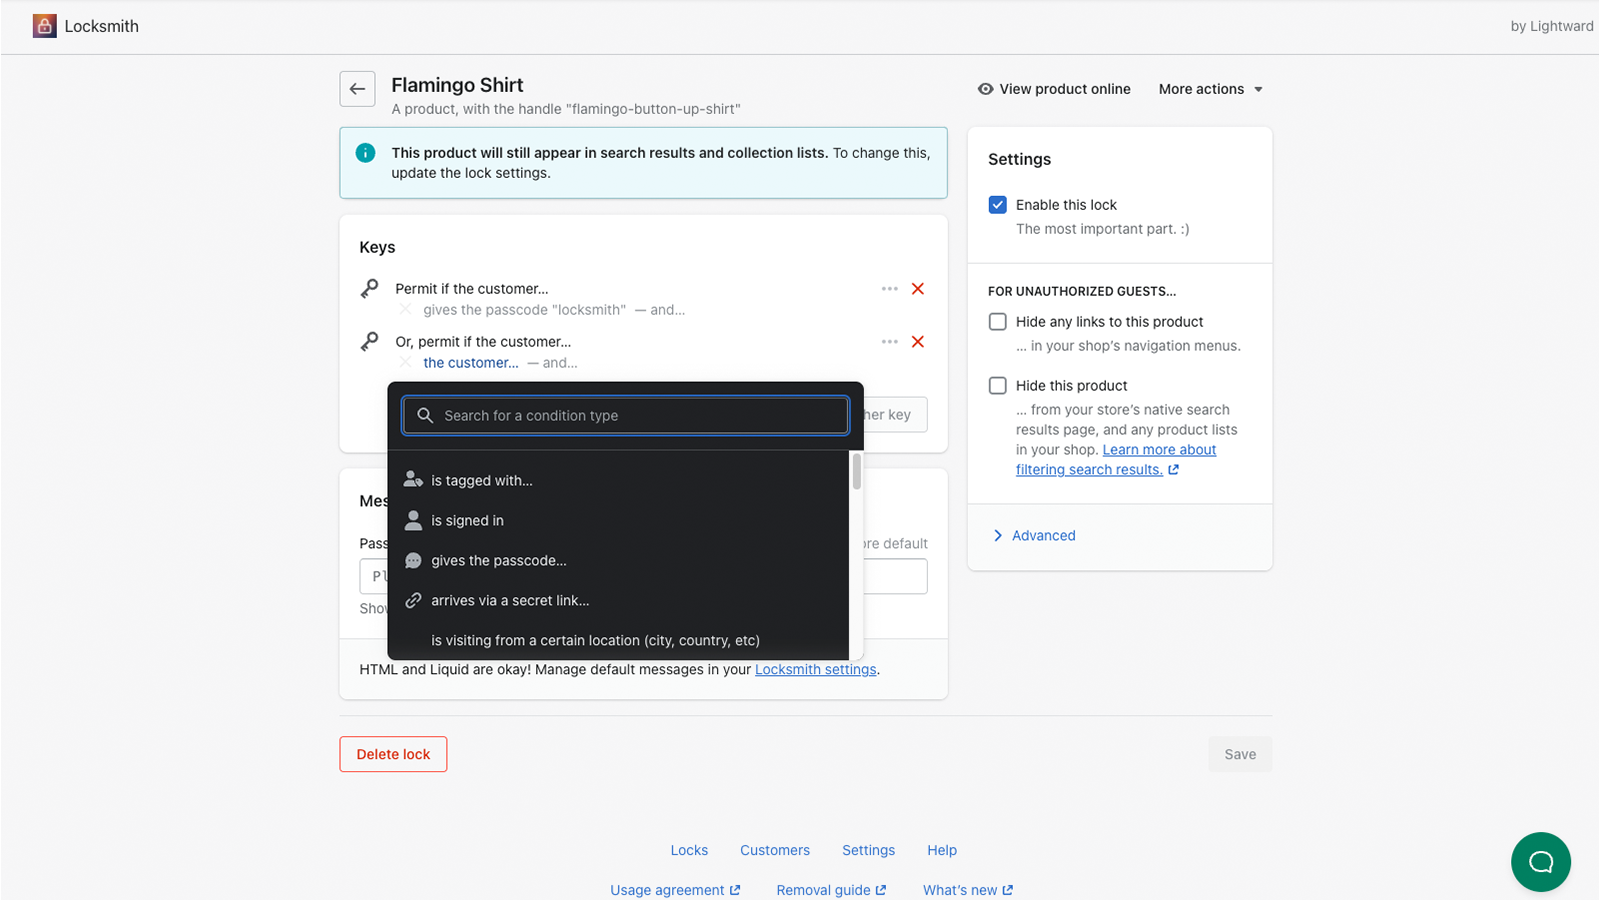
Locksmith
Locksmith is best used for access control rather than approval alone. It lets you lock products, collections, pages, prices, or content until a customer meets your conditions.
![]()
You can install it here: Locksmith. I have seen merchants use it alongside an approval app so that approved customer tags unlock content automatically.
This is a strong combination if your real goal is not just account approval, but hiding pricing, collections, or checkout access until a customer is approved. It is especially useful for trade stores running a public-facing storefront with private wholesale content behind the scenes.
How do I set up manual customer approval in Shopify with an app?
The basic setup is usually the same across approval apps. Install the app, replace or enhance your signup form, review incoming applications, then approve or deny them from the app dashboard.
Here is the process I generally recommend.
-
Choose your approval app
Pick an app based on how much information you need to collect. If you just need a simple yes or no workflow, Addify or Enhance may be enough. If you need richer forms, a more custom registration tool is often better. -
Decide what customers should see before approval
Some stores allow browsing but hide prices. Others hide collections entirely. Define this before setup so your workflow matches your business model. -
Create or customise the registration form
Ask only for the fields you genuinely need. Common fields include business name, VAT number, website, phone number, resale certificate, and customer type. -
Enable approval review
Turn on the setting that holds submissions in a pending or to-review state. This is the key step that stops instant activation. -
Set up approval and rejection emails
Write clear messages for pending, approved, and denied applications. Keep them short and explain the next step. -
Apply tags to approved customers
Tags like approved, wholesale, retailer, or distributor make future automation much easier. -
Use access control if needed
If your store has restricted pricing or content, connect tags to Locksmith or similar rules. -
Test the full journey
Submit a fake application, approve it, and make sure the customer gets the right email and access level.
One thing I always tell merchants is to test this in a development store first if possible. Customer account behaviour can differ depending on your theme, your account configuration, and whether you are using legacy or new customer accounts.
How do I approve customer accounts without using an app?
You can do it with a workaround, but it is more manual and less scalable. The usual approach is to remove the public signup option and replace it with a request form.
This is still a valid option for small stores with low signup volume. If you only get a handful of applications each week, a manual process can work perfectly well.
Option 1: Use a request membership form
This is the simplest no-app workflow. Customers fill in a form to request access, and you manually create or invite approved customers afterwards.
- Hide or remove direct signup links from your theme navigation and account pages
- Create a request access form on a page or contact form
- Review submissions manually in your inbox or form tool
- Create the customer in Shopify or send them an account invite if approved
- Tag the customer if you want to restrict access by customer segment
This method gives you full control, but it does create admin overhead. If you need help with customer-facing account navigation while setting this up, see my guide on adding a My Account link in the header and footer on Shopify.
Option 2: Let customers register, but lock access until approval
This approach works when you do not mind account creation, but you do want to control what customers can access. In that case, you can let signups happen normally and use tags plus Locksmith to gate content.
- Allow customers to create an account
- Use Locksmith to hide products, prices, pages, or collections
- Review the customer manually in Shopify admin
- Add an approved tag when they pass your checks
- Unlock the protected content for tagged customers
This is a good compromise for stores that care more about access restriction than about preventing the account record itself from being created.
What is the difference between legacy and new customer accounts in Shopify?
Legacy and new customer accounts differ mainly in login experience and feature set. New customer accounts use passwordless sign-in and support newer Shopify features, but they still do not include native manual approval.
This distinction matters because some merchants assume switching account types will unlock approval settings. It will not. The approval gap remains, so you still need an app or workaround.
According to Shopify's help documentation, new customer accounts support passwordless sign-in, persistent sessions, and integrations like social sign-in and Sign in with Shop. For Plus merchants, there is also support for a custom identity provider.
Those are useful improvements for customer experience, but from an approval perspective the key point is unchanged: Shopify still does not give you a built-in approval queue for new registrations.
How does customer approval work for Shopify B2B stores?
For Shopify B2B, the best setup is usually an approval form plus automation. You collect application data, approve the customer manually, then use tags or Flow to create the right B2B access and send onboarding emails.
This is where approval workflows become more than just a gate. They become part of your sales ops process. You are not only deciding who gets in, you are deciding which pricing, catalogue, company structure, and communication flow they should receive.
Recent guidance around B2B setups often references using a form tool with approval logic, then connecting approval to Shopify Flow. For example, once a customer is approved, you could:
- Create a company record from submitted business details
- Assign the customer as a company contact
- Apply B2B tags for access and segmentation
- Send a welcome or trade onboarding email
- Unlock wholesale pricing or collections
In my experience, this is the point where many merchants realise a simple yes or no approval app is not enough. If you run a serious wholesale operation, you often need the approval step to feed into the rest of your customer and pricing setup.
What should you include in a customer approval form?
The best approval forms collect only the information needed to make a decision. Too few fields create extra admin work, while too many fields reduce conversion.
For a retail members-only store, basic contact details may be enough. For wholesale, I would usually ask for a little more.
| Field | Why it matters | Best for |
|---|---|---|
| Full name | Basic identity and contact | All stores |
| Email address | Used for account invite and approval updates | All stores |
| Company name | Helps verify trade buyers | B2B and wholesale |
| VAT or tax ID | Useful for verification and invoicing | B2B and EU/UK trade stores |
| Website or social profile | Quick legitimacy check | Wholesale and stockists |
| Business type | Lets you segment retailer, distributor, salon, clinic, etc. | B2B |
| Document upload | Supports licence or reseller verification | Regulated or trade-only stores |
Keep the form as lean as possible. Every extra field can reduce completion rate, so only ask for what your team actually uses.
What are the main mistakes to avoid when approving Shopify customer accounts?
The biggest mistake is thinking account approval and content restriction are the same thing. They are related, but they solve different problems.
Approval controls who gets accepted. Restriction controls what accepted and non-accepted users can see. Many stores need both, and problems happen when only one side is implemented.
- Leaving public pricing visible even though you approve accounts manually
- Collecting too little information to make a proper approval decision
- Collecting too much information and hurting signup conversion
- Not tagging approved customers, which makes future automation harder
- Not testing approval emails, so customers never know what happened
- Forgetting theme links to login or register pages that bypass your intended flow
I would also be careful with edge cases like draft orders, invoice flows, and edited orders for approved customers. If those processes are part of your business, these related guides may help: how to send an invoice to a customer in Shopify and editing customer orders in Shopify.
My recommended setup for most merchants
For most stores, I recommend a dedicated approval app plus access control tags if needed. That gives you a clean approval process without boxing you into a fragile manual workaround.
If I were setting this up today for a typical wholesale or trade-only merchant, I would usually do the following:
- Use Addify - Approve New Customers or a similar approval app for intake and review
- Collect only the fields needed to verify the applicant
- Tag approved customers clearly, such as approved, wholesale, or retailer
- Use Locksmith if products, prices, or pages need to stay hidden until approval
- Connect approved tags to your email, discount, or B2B workflows
Best for small stores: the request form workaround can be enough.
Best for growing wholesale stores: use an approval app.
Best for restricted catalogues: combine approval with Locksmith.
Final answer: how do you approve customer accounts upon creation in Shopify?
You approve customer accounts upon creation in Shopify by using a third-party app or a manual request workflow, because Shopify does not offer native account approval. The most practical options are a dedicated app like Addify - Approve New Customers, a custom request form, or tag-based access control with Locksmith.
If you want the shortest path to a working setup, start with an approval app. If you need a trade-only storefront with hidden content, pair approval with access control. And if your store only gets occasional applications, a manual request form can still do the job.
That is the honest answer in 2026, and it matches what I see across real Shopify stores: there is no native approval toggle, but there are several solid ways to build the workflow properly.